

Note
This feature is currently in beta and subject to change. To learn more about the Beta program for this feature, contact your Marqeta representative.
This feature is currently in beta and subject to change. To learn more about the Beta program for this feature, contact your Marqeta representative.
- Create and view credit policies for credit products, APRs, fees, and rewards.
- Create, activate, view, and archive bundles.
- View templates available for the program to use.
The basics
To manage credit programs, log into the Marqeta Dashboard, select Dashboard in the upper-left corner, and then select Credit programs from the sidebar. For more on accessing the Marqeta Dashboard, see Access the Marqeta Dashboard.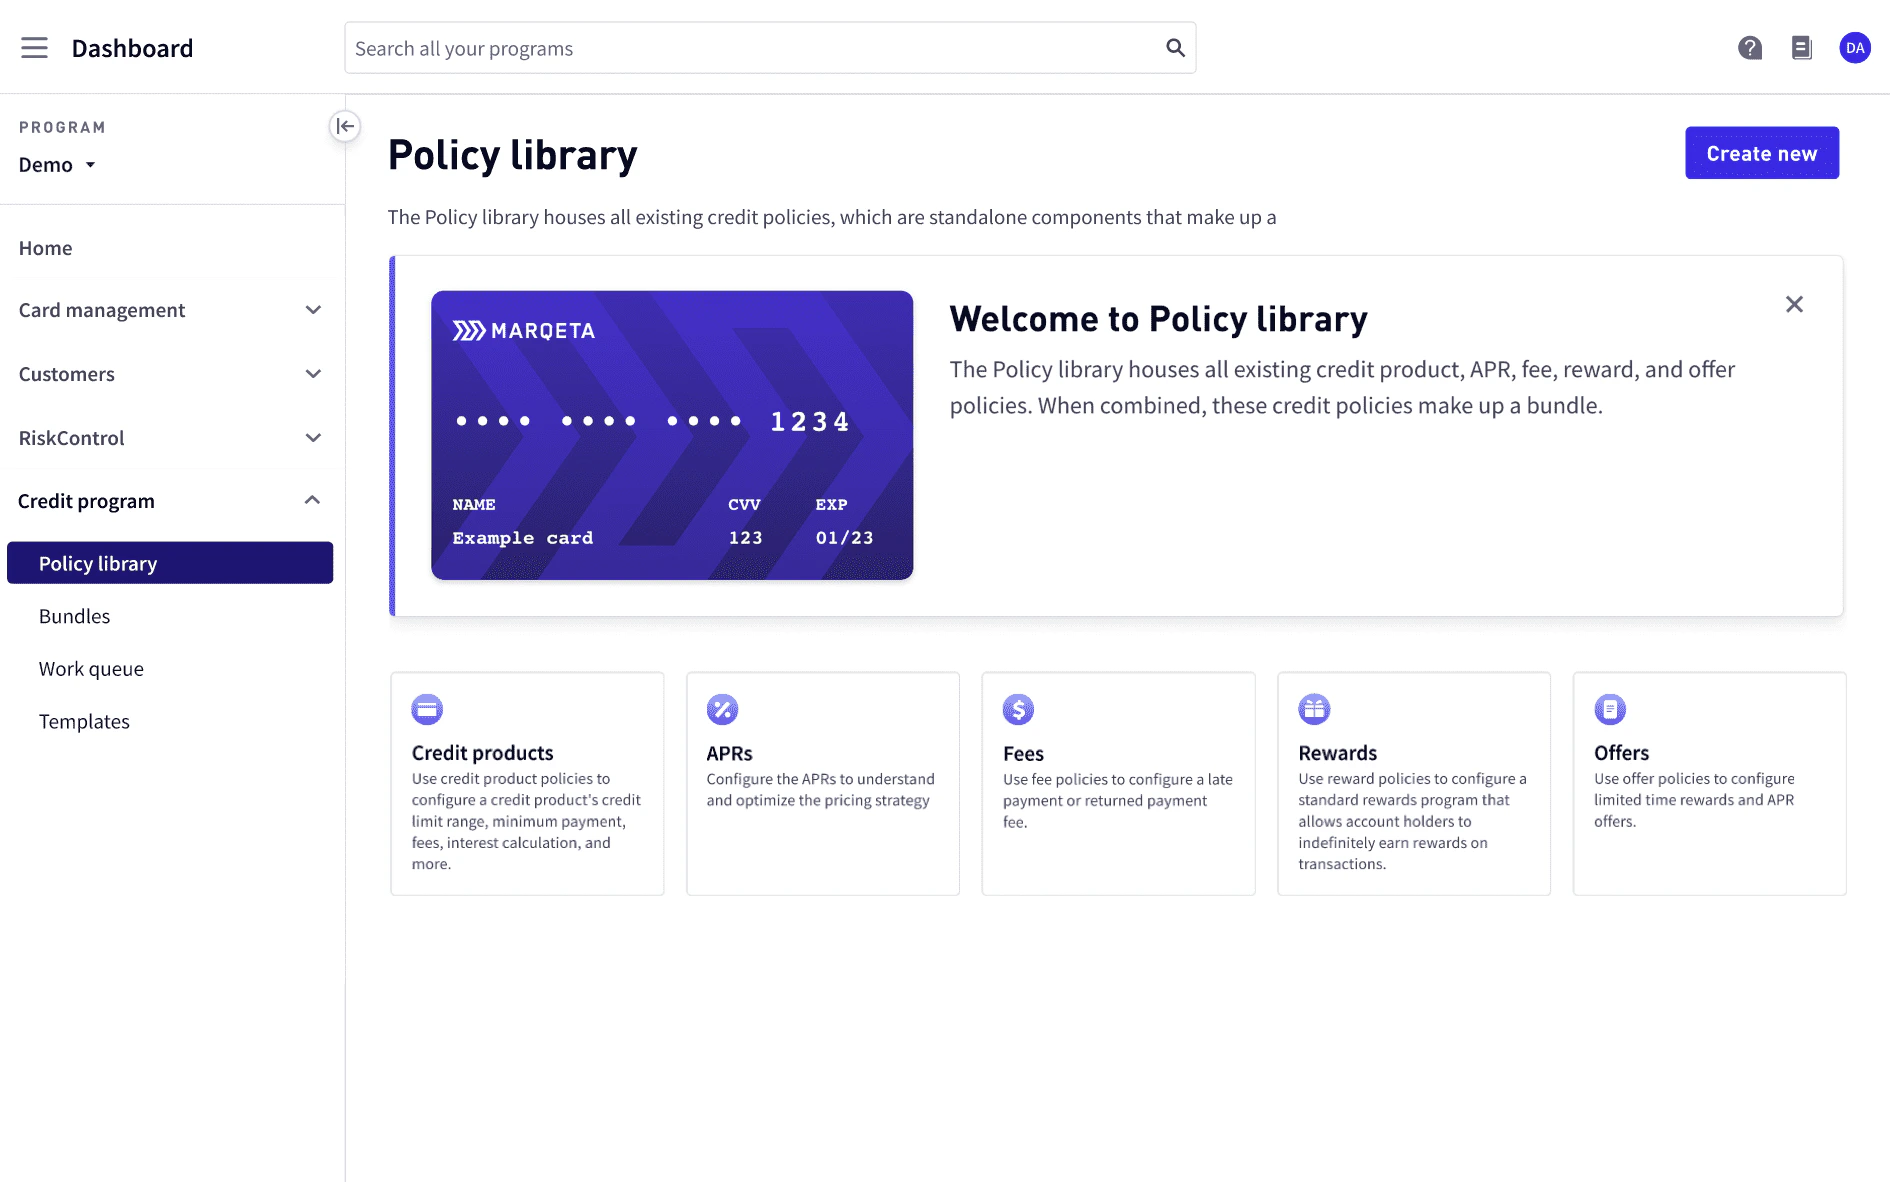
How to…
- Create a credit product policy
- View a list of credit product policies
- View credit product policy details
- Create an APR policy
- View a list of APR policies
- View APR policy details
- Create a fee policy
- View a list of fee policies
- View fee policy details
- Create a reward policy
- View a list of reward policies
- View reward policy details
- Create a bundle
- View a list of bundles
- View bundle details
Roles
Marqeta Dashboard users with an Admin role can assign roles to other users. For details on how to manage users as an Admin, see User management. Roles define the privileges that are available to Dashboard users. Credit Program users can be assigned the following roles:Policy library
Use the Policy Library to create and view your credit product policies, which contain custom configurations for credit products, APRs, fees, and rewards. If you have the Creator role, you can combine the policies into a bundle. By choosing specific policies to add, you can create a bundle with the exact configurations needed to launch a new credit program or help manage an existing one. The configurations of each policy in a bundle determine the characteristics and attributes of the bundle’s associated credit accounts, reward programs, disclosures, and more. For more on bundles, see Bundles.Note
To view the complete endpoint reference available for reference purposes only, see Policies.To create and manage policies, you must use the Marqeta Dashboard.
To view the complete endpoint reference available for reference purposes only, see Policies.To create and manage policies, you must use the Marqeta Dashboard.
Creating a credit product policy
If you have the Creator role, you can create a new credit product policy as described in Roles. To create a credit product policy:1
Select Policy Library > Create new > Credit products.
2
Select the card product and assign it a level, either premium or traditional.
3
Enter a name and description of the credit product policy.
4
Review the credit product classification, type, subtype, and currency type.
5
Define the credit limit minimum and maximum amounts.
6
Review the billing cycle day, payment due day, and balance usage.
7
Define the minimum payment percentage and amount.
8
Select whether to include the past due amount in the minimum payment.
9
Review the method, daily periodic rate day count convention, and balance types to include in the interest application.
10
Enter the minimum interest amount.
11
Review the residual interest, grace days application, credits application, excluded transaction types, and the payment allocation order.
12
From the top-right corner, select Create policy.
Viewing a list of credit product policies
To view a list of credit product policies, go to Policy library > Credit products. Credit product policies are listed by name. Each line item displays:- Credit product name.
- Credit limit minimum and maximum.
- Date the credit product was created.
Credit product policy details
To display the credit product policy details, select the credit product name from the list of credit product policies. The following Credit product policy information is displayed.
The following Interest calculation information is displayed.
To exit credit product policy details, select x from the top-right corner.
Creating an APR policy
If you have the Creator role, you can create a new APR policy as described in Roles. To create an APR policy:1
Select Policy Library > Create new > APRs.
2
Enter a name and description of the APR policy.
3
Review the usage type and APR type.
4
Select a pricing strategy from the list of available strategies.
- For the selected pricing strategy, review the Go-to APR for each risk tier and its corresponding margin.
5
From the top-right corner, select Create policy.
Viewing a list of APR policies
To view a list of APR policies, go to Policy library > APRs. APR policies are listed by name. Each line item displays:- APR name.
- Go-to range rate.
- Date the prime rate went into effect.
APR policy details
To display APR policy details, select the APR name from the list of APR policies. The following APR policy information is displayed.
To exit APR policy details, select x from the top-right corner.
Creating a fee policy
If you have the Creator role, you can create a new fee policy as described in Roles. To create a fee policy:1
Select Policy Library > Create new > Fees.
2
Enter a name and description of the fee policy.
3
Select whether to include late payment fees in the fee policy.
4
Select No late payment fees to exclude late payment fees.
5
Select Include late payment fees and enter a late payment fee amount to include late payment fees.
6
From the top-right corner, select Create policy.
Viewing a list of fee policies
To view a list of fee policies, go to Policy library > Fees. Fee policies are listed by name. Each line item displays:- Fee name.
- Amount of the late payment fee.
- Amount of the returned payment fee.
Fee policy details
To display fee policy details, select the fee name from the list of fee policies. The following Fee policy information is displayed.
To exit APR policy details, select x from the top-right corner.
Creating a reward policy
If you have the Creator role, you can create a new reward policy as described in Roles. To create a reward policy:1
To create a reward policy, select Policy Library > Create new > Rewards.
2
Enter a name and description of the reward policy.
3
Review the reward type, merchant category code (MCC) rule, and reward period.
4
Add a minimum purchase rule.
- Enter the percentage reward that the cardholder can earn.
- Select whether the cardholder must spend greater than a minimum amount, less than a maximum amount, or within a range of amounts.
- Enter the minimum or maximum amount the cardholder must spend to earn the reward.
5
From the top-right corner, select Create policy.
Viewing a list of reward policies
To view a list of reward policies, go to Policy library > Rewards. Reward policies are listed by name. Each line item displays:- Reward name.
- Description of the reward.
- Type of reward.
Reward policy details
To display reward policy details, select the reward name from the list of rewards. The following reward policy information is displayed.
To exit reward policy details, select x from the top-right corner.
Bundles
Use Bundles to create and view your bundles. A bundle consists of several policies “bundled” together. Each bundle must contain one credit product policy, APR policy, and fee policy. A reward policy is optional. The configurations of each policy in a bundle determine the characteristics and attributes of the bundle’s associated credit accounts, reward programs, disclosures, and more. For more on policies, see Policy library.Note
To view the complete endpoint reference available for reference purposes only, see Bundles.To create and manage bundles, you must use the Marqeta Dashboard.
To view the complete endpoint reference available for reference purposes only, see Bundles.To create and manage bundles, you must use the Marqeta Dashboard.
Bundle statuses
A bundle can have one of the following statuses.Creating a bundle
If you have the Creator role, you can create a new bundle as described in Roles. To create a bundle:1
Select Bundles > Create new.
2
Enter a name and description of the bundle.
3
Select a credit product policy, APR policy, fee policy, and reward policy to add to the bundle.
4
From the top-right corner, select Continue.
5
Enter a note about the bundle to the Approver.
6
In Disclosures, review and download the Summary of Credit Terms (SOCT) for future use.
7
Review each policy and ensure the configurations for the credit product policy, APR policy, and fee policy are captured in the SOCT.
8
From the top-right corner, select Submit to send the bundle to the Approver for review.
Viewing a list of active and rejected bundles
To view a list of active and rejected bundles, go to Policy library > Bundles. To view bundles in other states, such as review or revision, see the Work queue. Bundles are listed by name. Each line item displays:- Bundle name.
- Status of the bundle.
- Date the bundle was created.
Bundle details
To display bundle details, select the bundle’s name from the list of bundles.- The Note section allows Creators and Approvers to make notes about the bundle to each other. Enter a note to be viewed by others working on the bundle.
- The Disclosures section displays the Summary of Credit Terms (SOCT).
- Select to view the SOCT.
- The bundle’s credit policy details are displayed.
- View the bundle’s credit product policy details.
- View the bundle’s APR policy details.
- View the bundle’s fee policy details.
- View the bundle’s reward policy details.
Work queue
If you have the Creator or Approver role, you can use the Work queue to manage your bundles needing revision, needing review, awaiting approval, or awaiting activation. Bundles are listed by name. Each line item displays:- Bundle name.
- Status of the bundle.
- Date the bundle was created.