

How to…
- Manage Commando Mode
- View and manage Dashboard users
- View available user roles
- Add a user
- Enable or disable a user
- Impersonate a user
- View audit logs
- Manage your sandbox
- Manage ACH direct deposit
- Enable PIN Reveal
- Enable 3D Secure
- Access developer tools
Commando Mode
If your system cannot respond to a Gateway JIT Funding request, the Marqeta platform can use Commando Mode to make authorization decisions on your behalf based on defined business rules. The Marqeta platform stores any unsent webhooks for later transmission, so that card states and account balances on your system correspond with activity that occurred while Commando Mode was in effect.Viewing Commando Mode controls
To view current Commando Mode controls:- Go to Program Controls > Control center > Commando mode. The current commando mode configurations and their status are displayed.
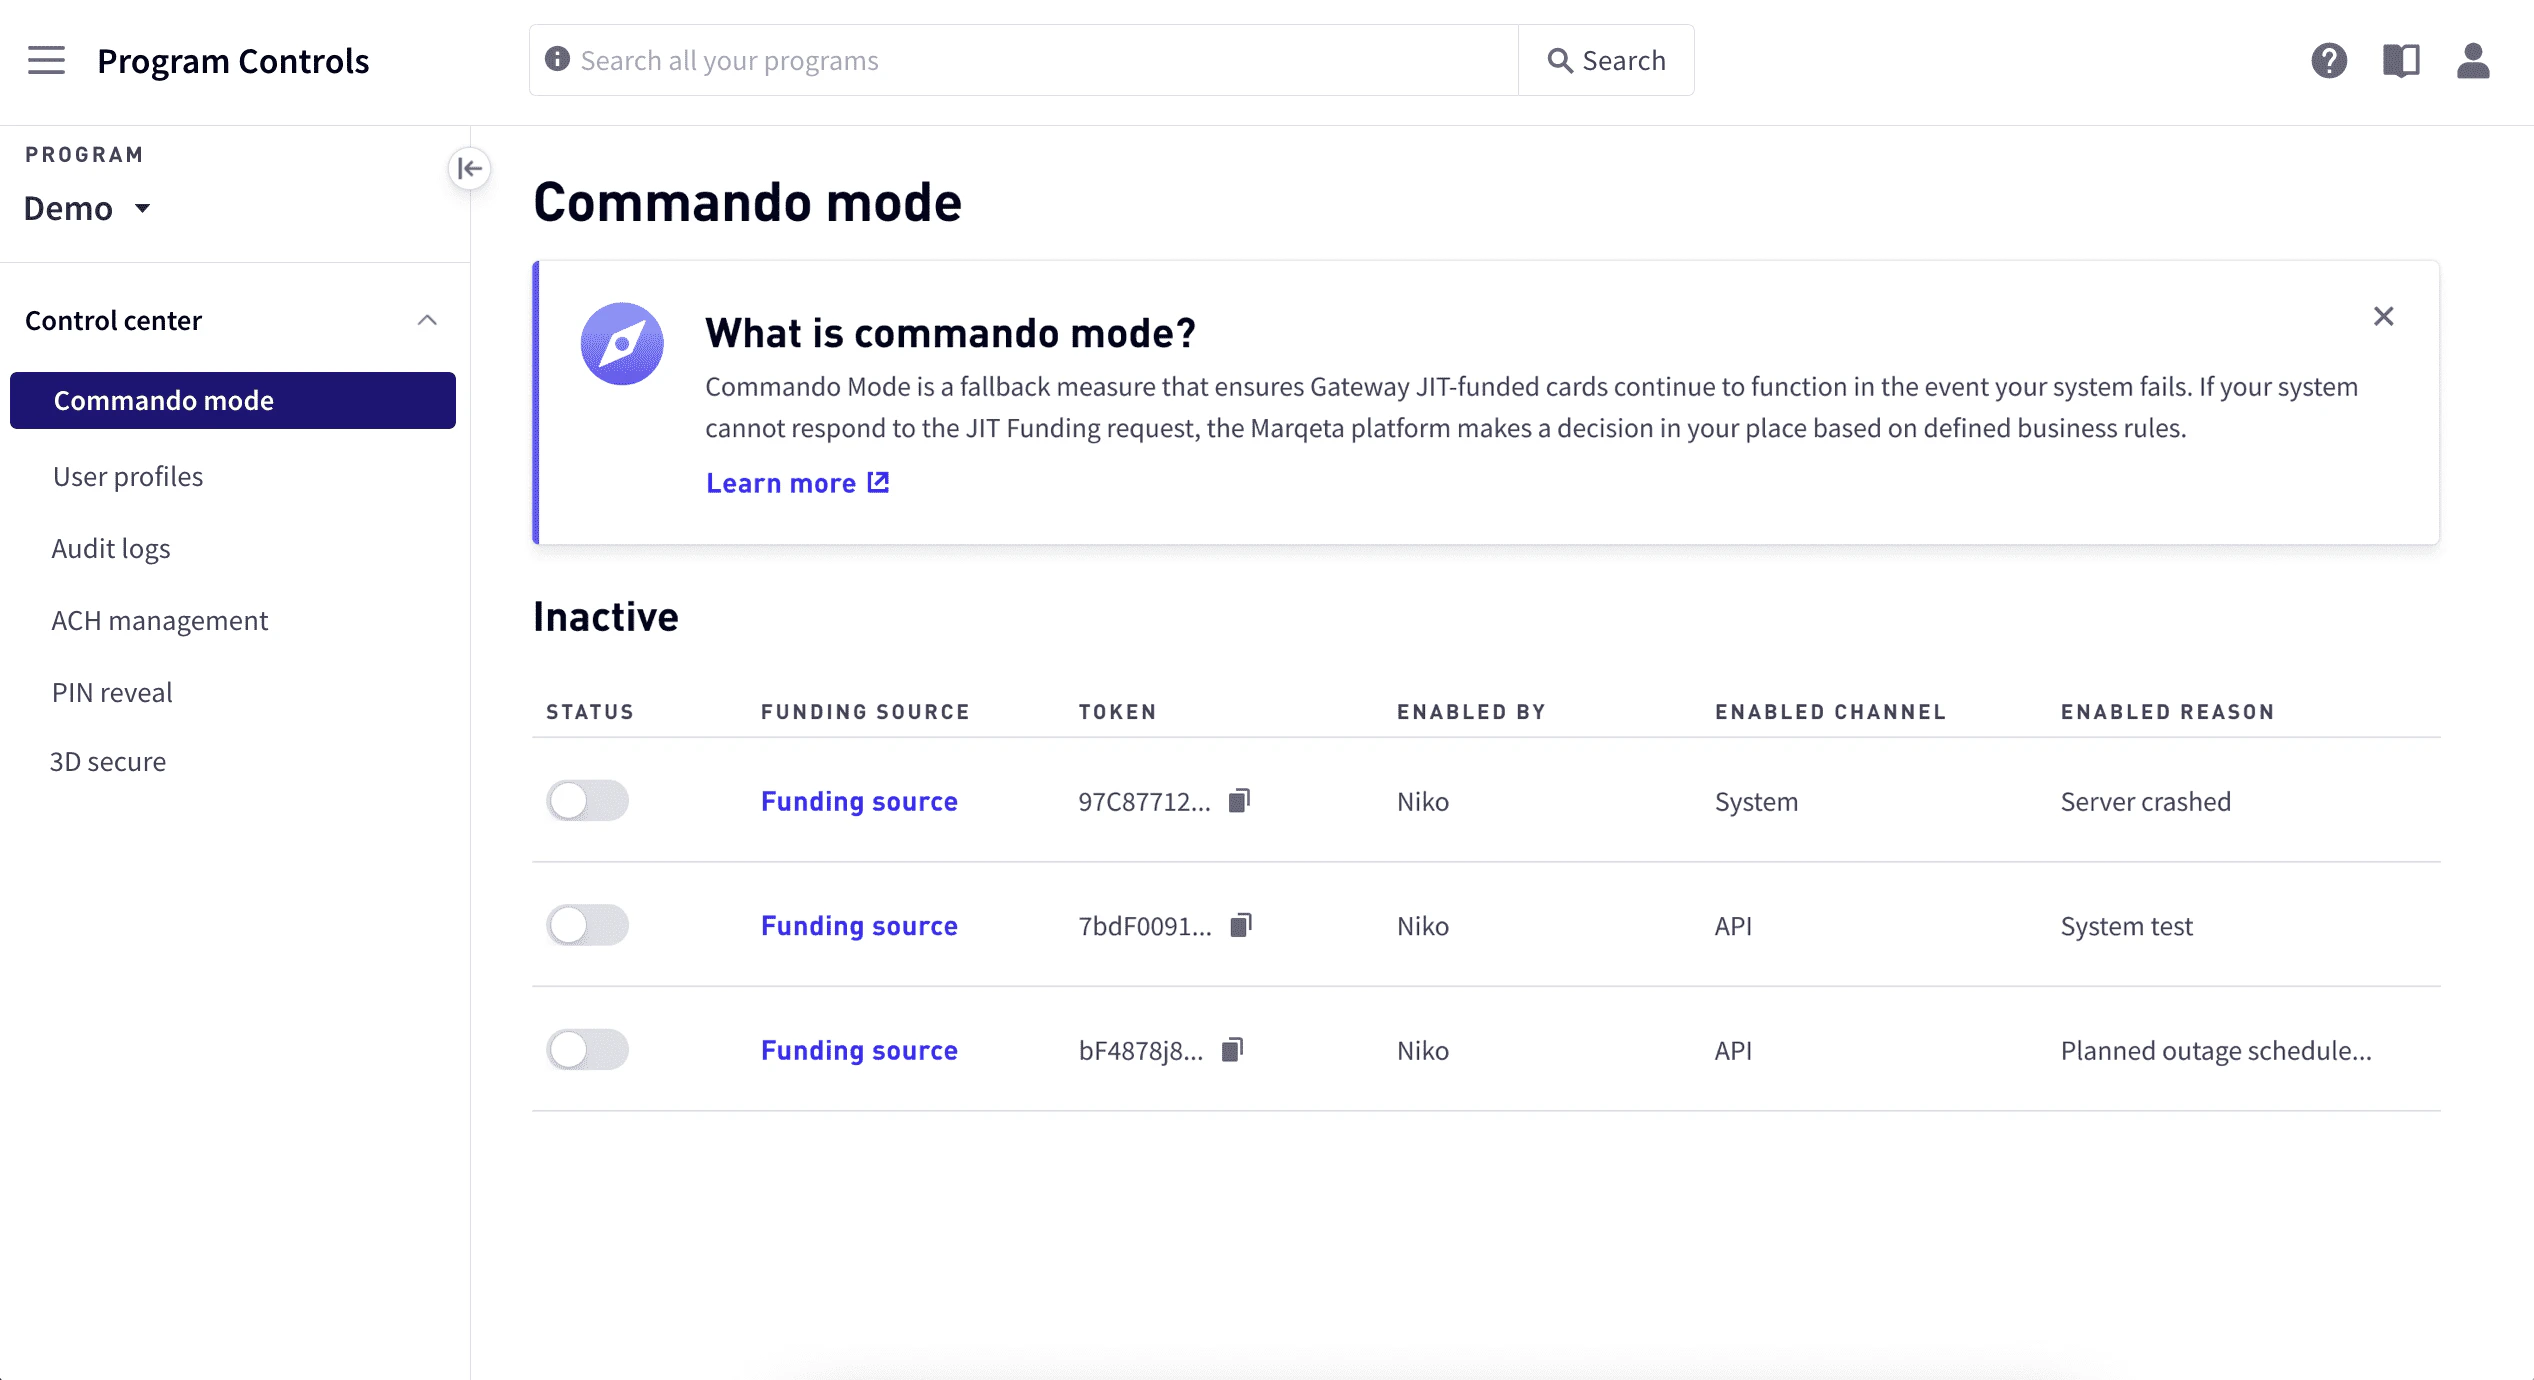
Enabling or disabling a Commando Mode control
To enable or disable a Commando Mode control:1
Go to Program Controls > Control center > Commando mode.
2
Select the toggle button in the Status column for the Commando Mode control to change.
3
In the popup window, enter a reason and select Enable or Disable.
Viewing Commando Mode control information
To view Commando Mode control information:1
Go to Program Controls > Control center > Commando mode. The enabled by, enable channel, and enable reason are displayed at the top.
2
To enable or disable the current control, select the toggle button, enter a reason in the popup, and select Enable or Disable.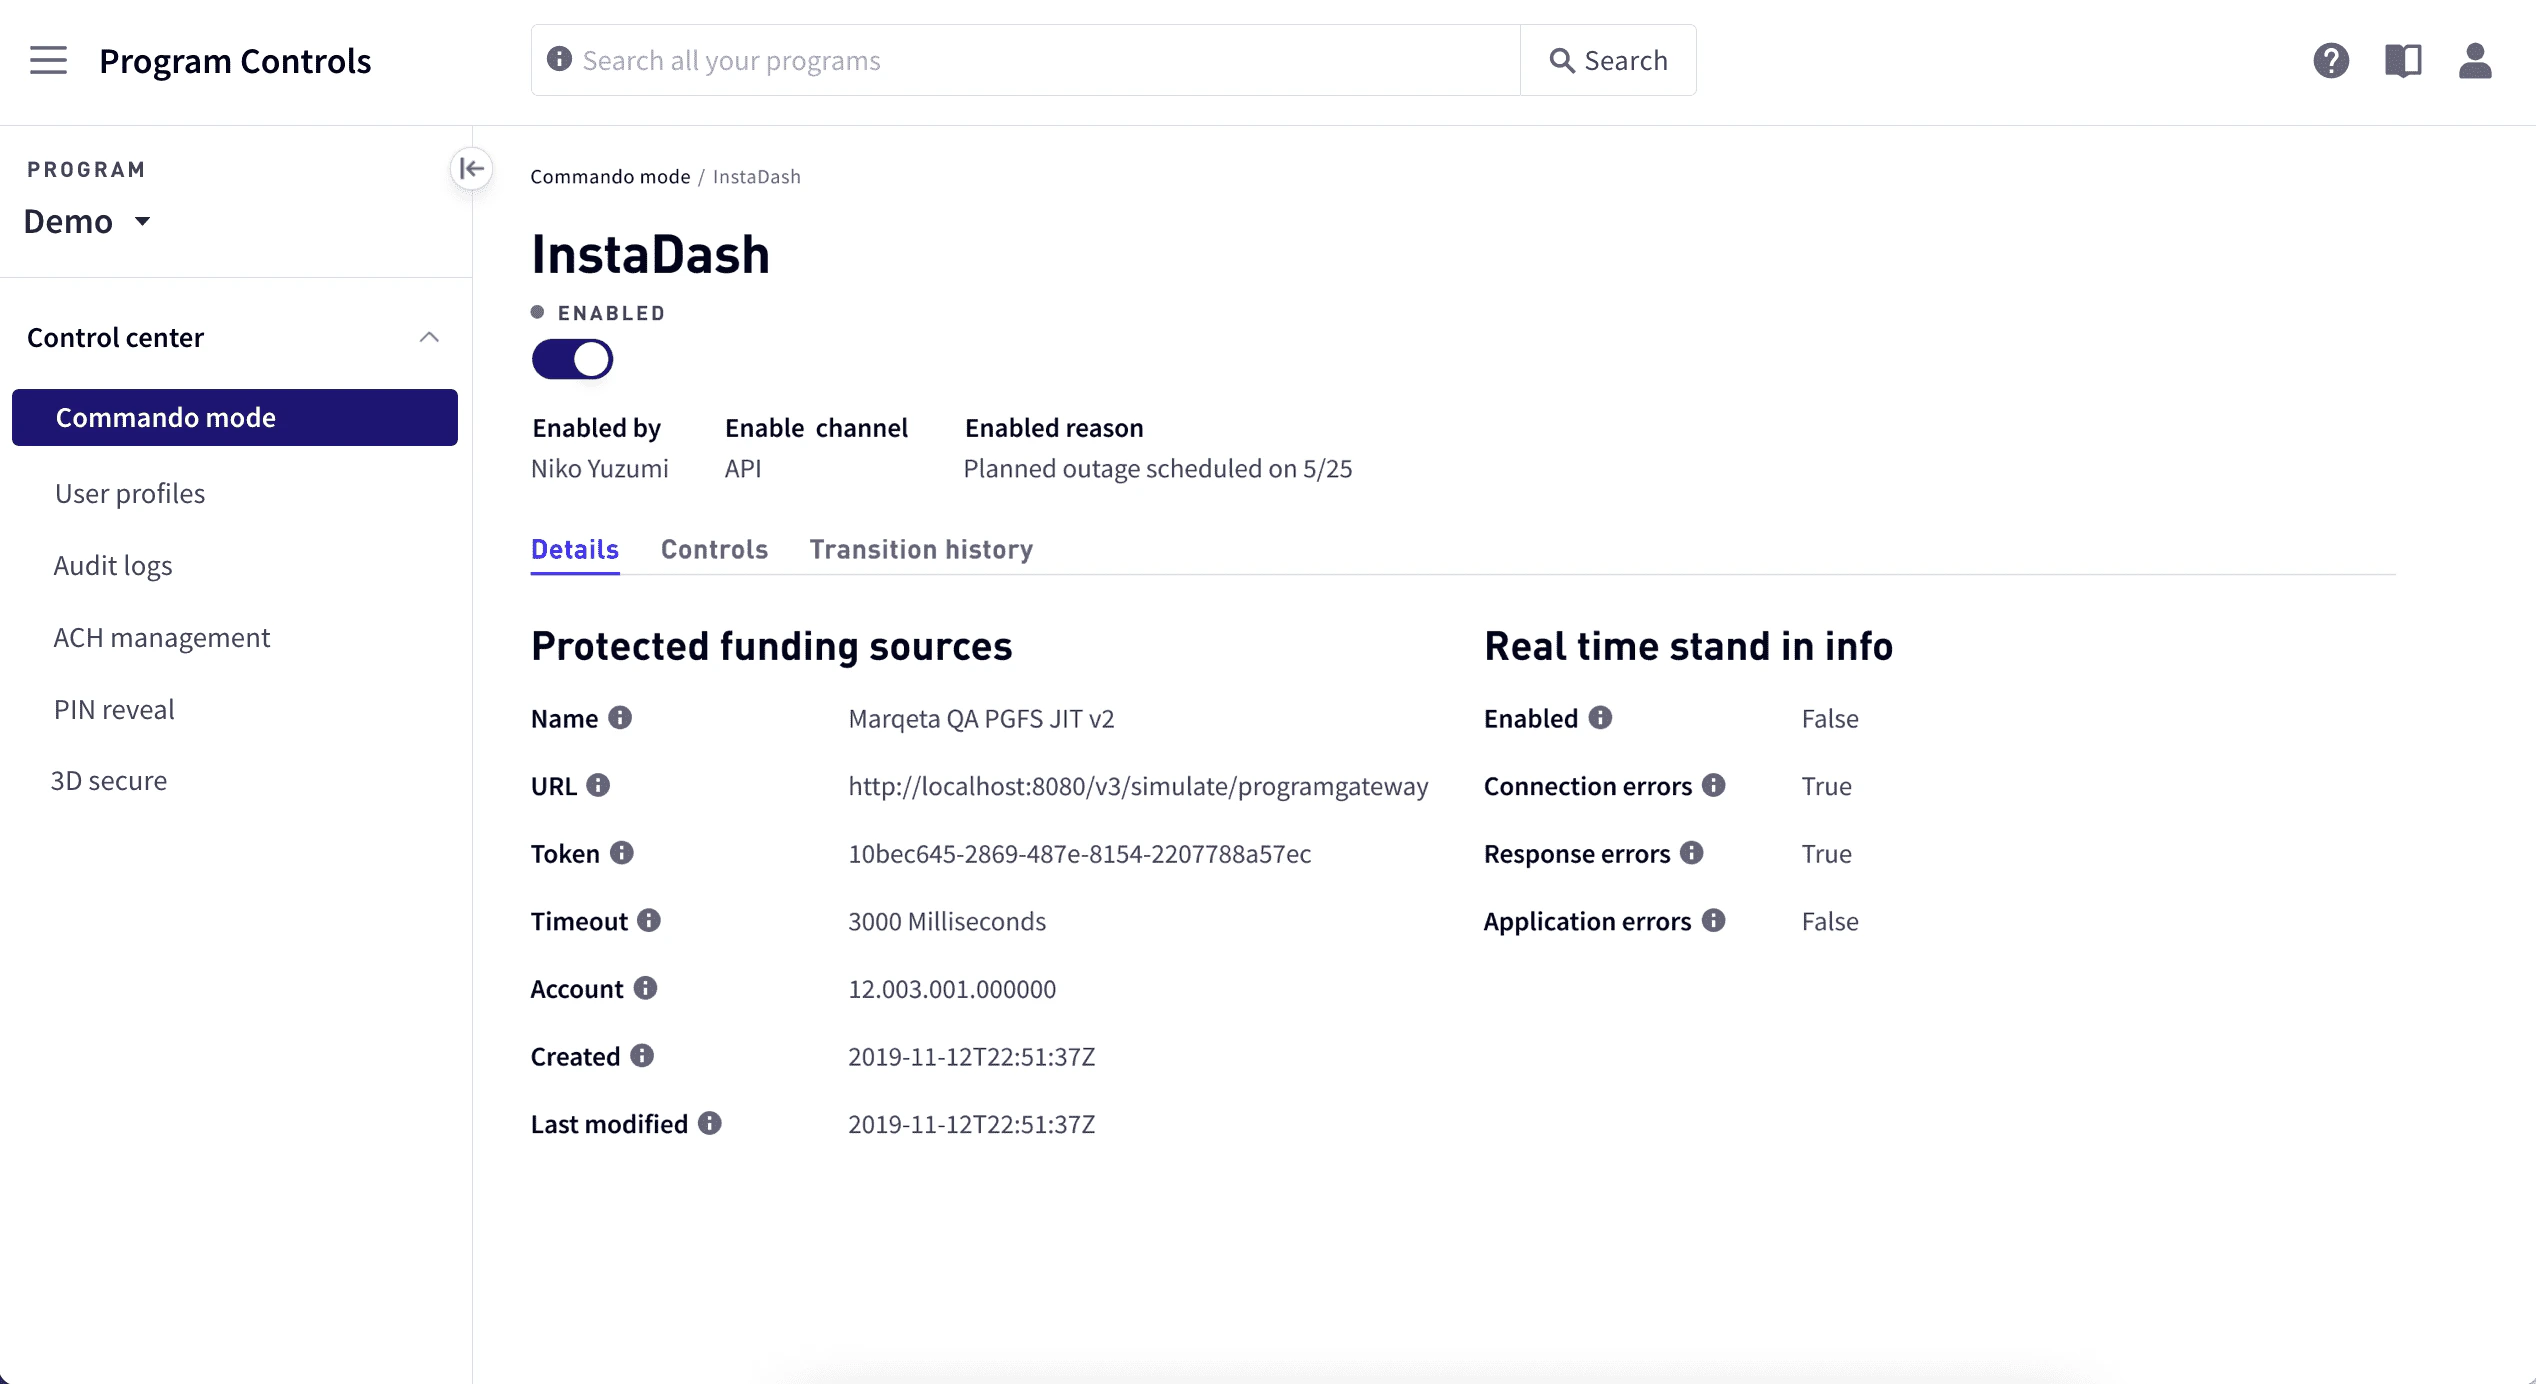
3
Select Details, Control, or Transition History tab to view that information. The information for each tab is described below.
Commando mode control information
Details
This tab shows details for Protected Funding Sources and Real Time Stand In Info.Protected funding sources
Real time stand in info
Controls
This tab provides information on the velocity control set defined for this Commando Mode control.Velocity controls
Auth controls
This table describes the authorization controls defined for this Commando Mode control set.Transition history
This tab provides details for each of the transitions for this Commando Mode control set.User profiles
Warning
We are planning to deprecate this version of User Profiles in the near future. Rather than this version of User Profiles, you should begin using User Profile Management as soon as possible.
We are planning to deprecate this version of User Profiles in the near future. Rather than this version of User Profiles, you should begin using User Profile Management as soon as possible.
- View user information.
- Add users and edit user information.
- Define user roles.
- Enable and disable users.
- Impersonate users.
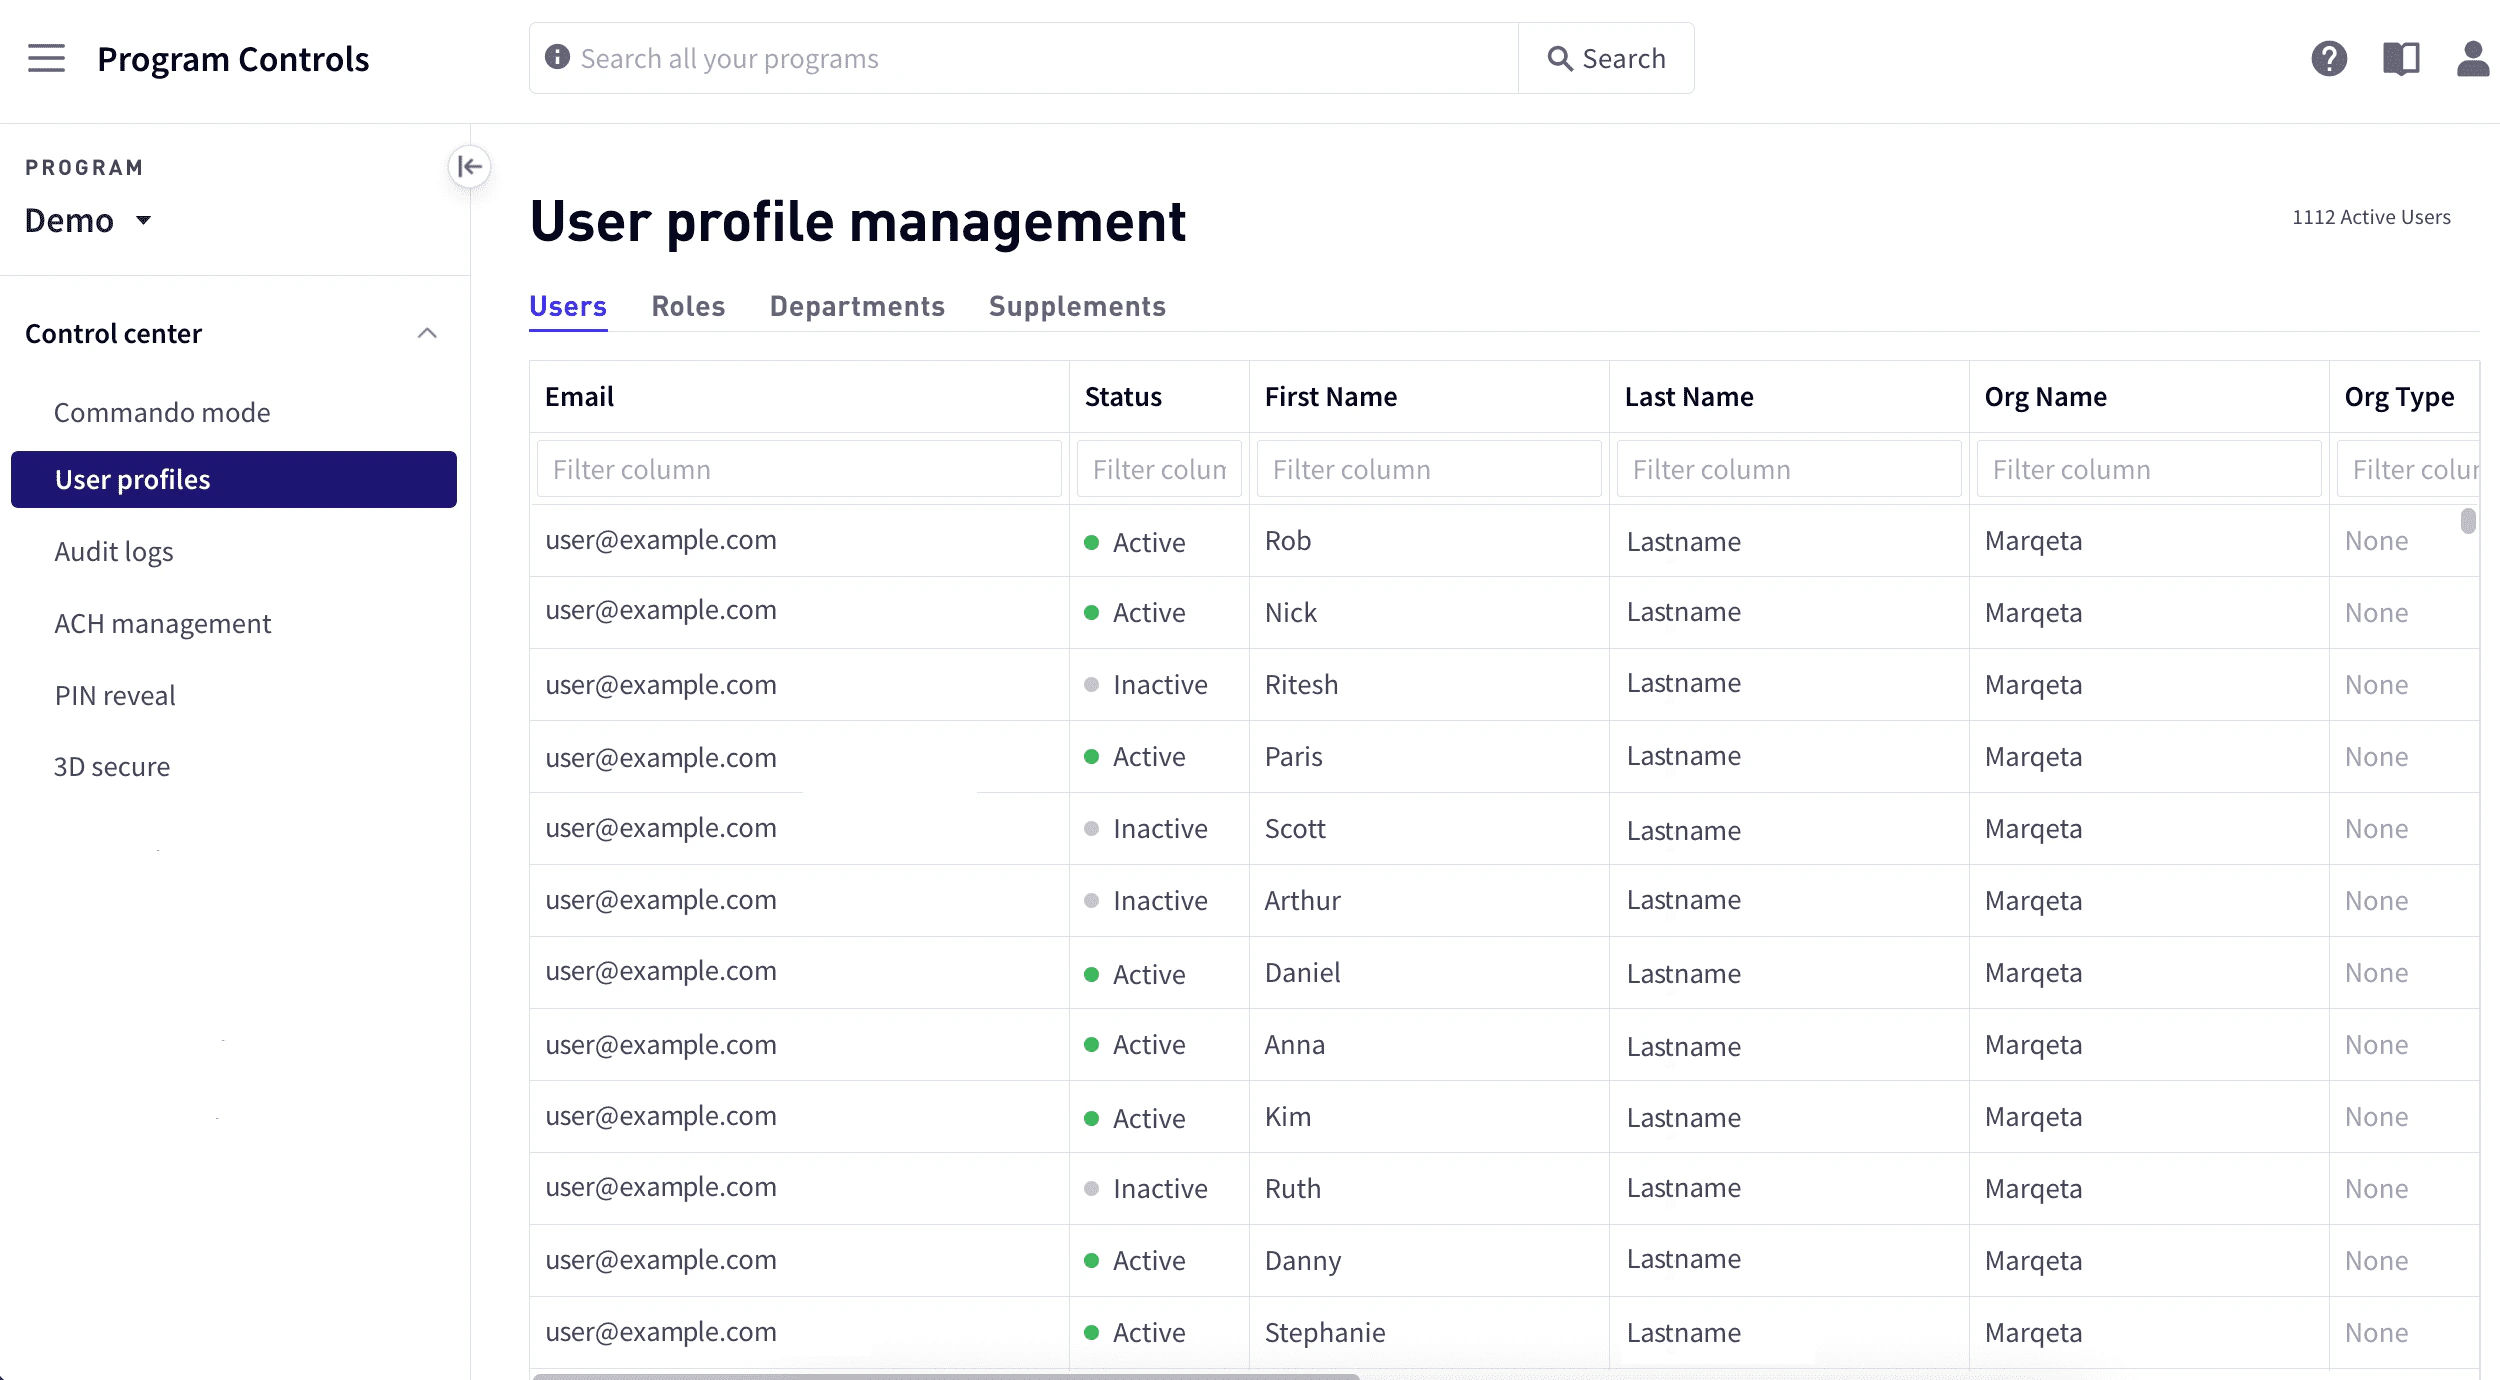
View user information
To view user information, go to Control center > User profiles. The Users tab lists current users along with the following information:Filtering by column
To filter rows by column, enter the sequence of letters you want to filter on in the text box at the top of the column. As you type, the matching rows are filtered dynamically.Adding users
To add a user:1
In the Users tab, select Add user.
2
In the popup window, enter the user’s information. For Role, choose a one of the roles, as described in Roles below. For Department, choose one or more described in Departments below.
3
Select Add user. The user receives an email invitation to join.
Note
By default, access to personally identifiable information (PII) is denied. Access can only be granted with accordance to your company and the issuing bank’s privacy and information security policies.If a user needs access to PII, submit a request to analytics@marqeta.com providing user information along with a brief but complete explanation of why PII access is needed. For example, “Customer service rep needs PII access to resolve customer KYC issues.” Users should be granted the lowest level of access required to fulfill their job responsibilities. If you have any questions, contact your Marqeta representative or send your question to analytics@marqeta.com.
By default, access to personally identifiable information (PII) is denied. Access can only be granted with accordance to your company and the issuing bank’s privacy and information security policies.If a user needs access to PII, submit a request to analytics@marqeta.com providing user information along with a brief but complete explanation of why PII access is needed. For example, “Customer service rep needs PII access to resolve customer KYC issues.” Users should be granted the lowest level of access required to fulfill their job responsibilities. If you have any questions, contact your Marqeta representative or send your question to analytics@marqeta.com.
Resending an invitation
To resend an invitation:1
Go to Program Controls > Control center > User profiles, and select the row for the user.
2
In the User profile management pane, select Resend Invite.
Editing a user’s information
To edit a user’s information:1
Go to Program Controls > Control center > User profiles, and select the row for the user.
2
In the User profile pane, update any of the user’s basic information, or add and remove programs, departments, roles, and supplements as necessary.
3
Select Save.
Enabling and disabling users
To enable or disable a user:1
Go to Program Controls > Control center > User profiles, and select the row for the user.
2
In the User profile pane, select the Edit icon in the upper-right corner.
3
Select the Status toggle control to change the user’s status and then select Save.
Impersonating a user
If you have the Admin or Support role, you can impersonate some users, as described in Roles below. To impersonate another user:1
In Program Controls > Control center > User profiles, select the row for the user.
2
In the User profile pane, select View as <user_name>. The Dashboard as seen by the selected user is displayed, where you can act as that user.
3
When you have finished, select End at the bottom.
Roles
Roles define the privileges that are available to dashboard users. Users can be assigned the following roles:Departments
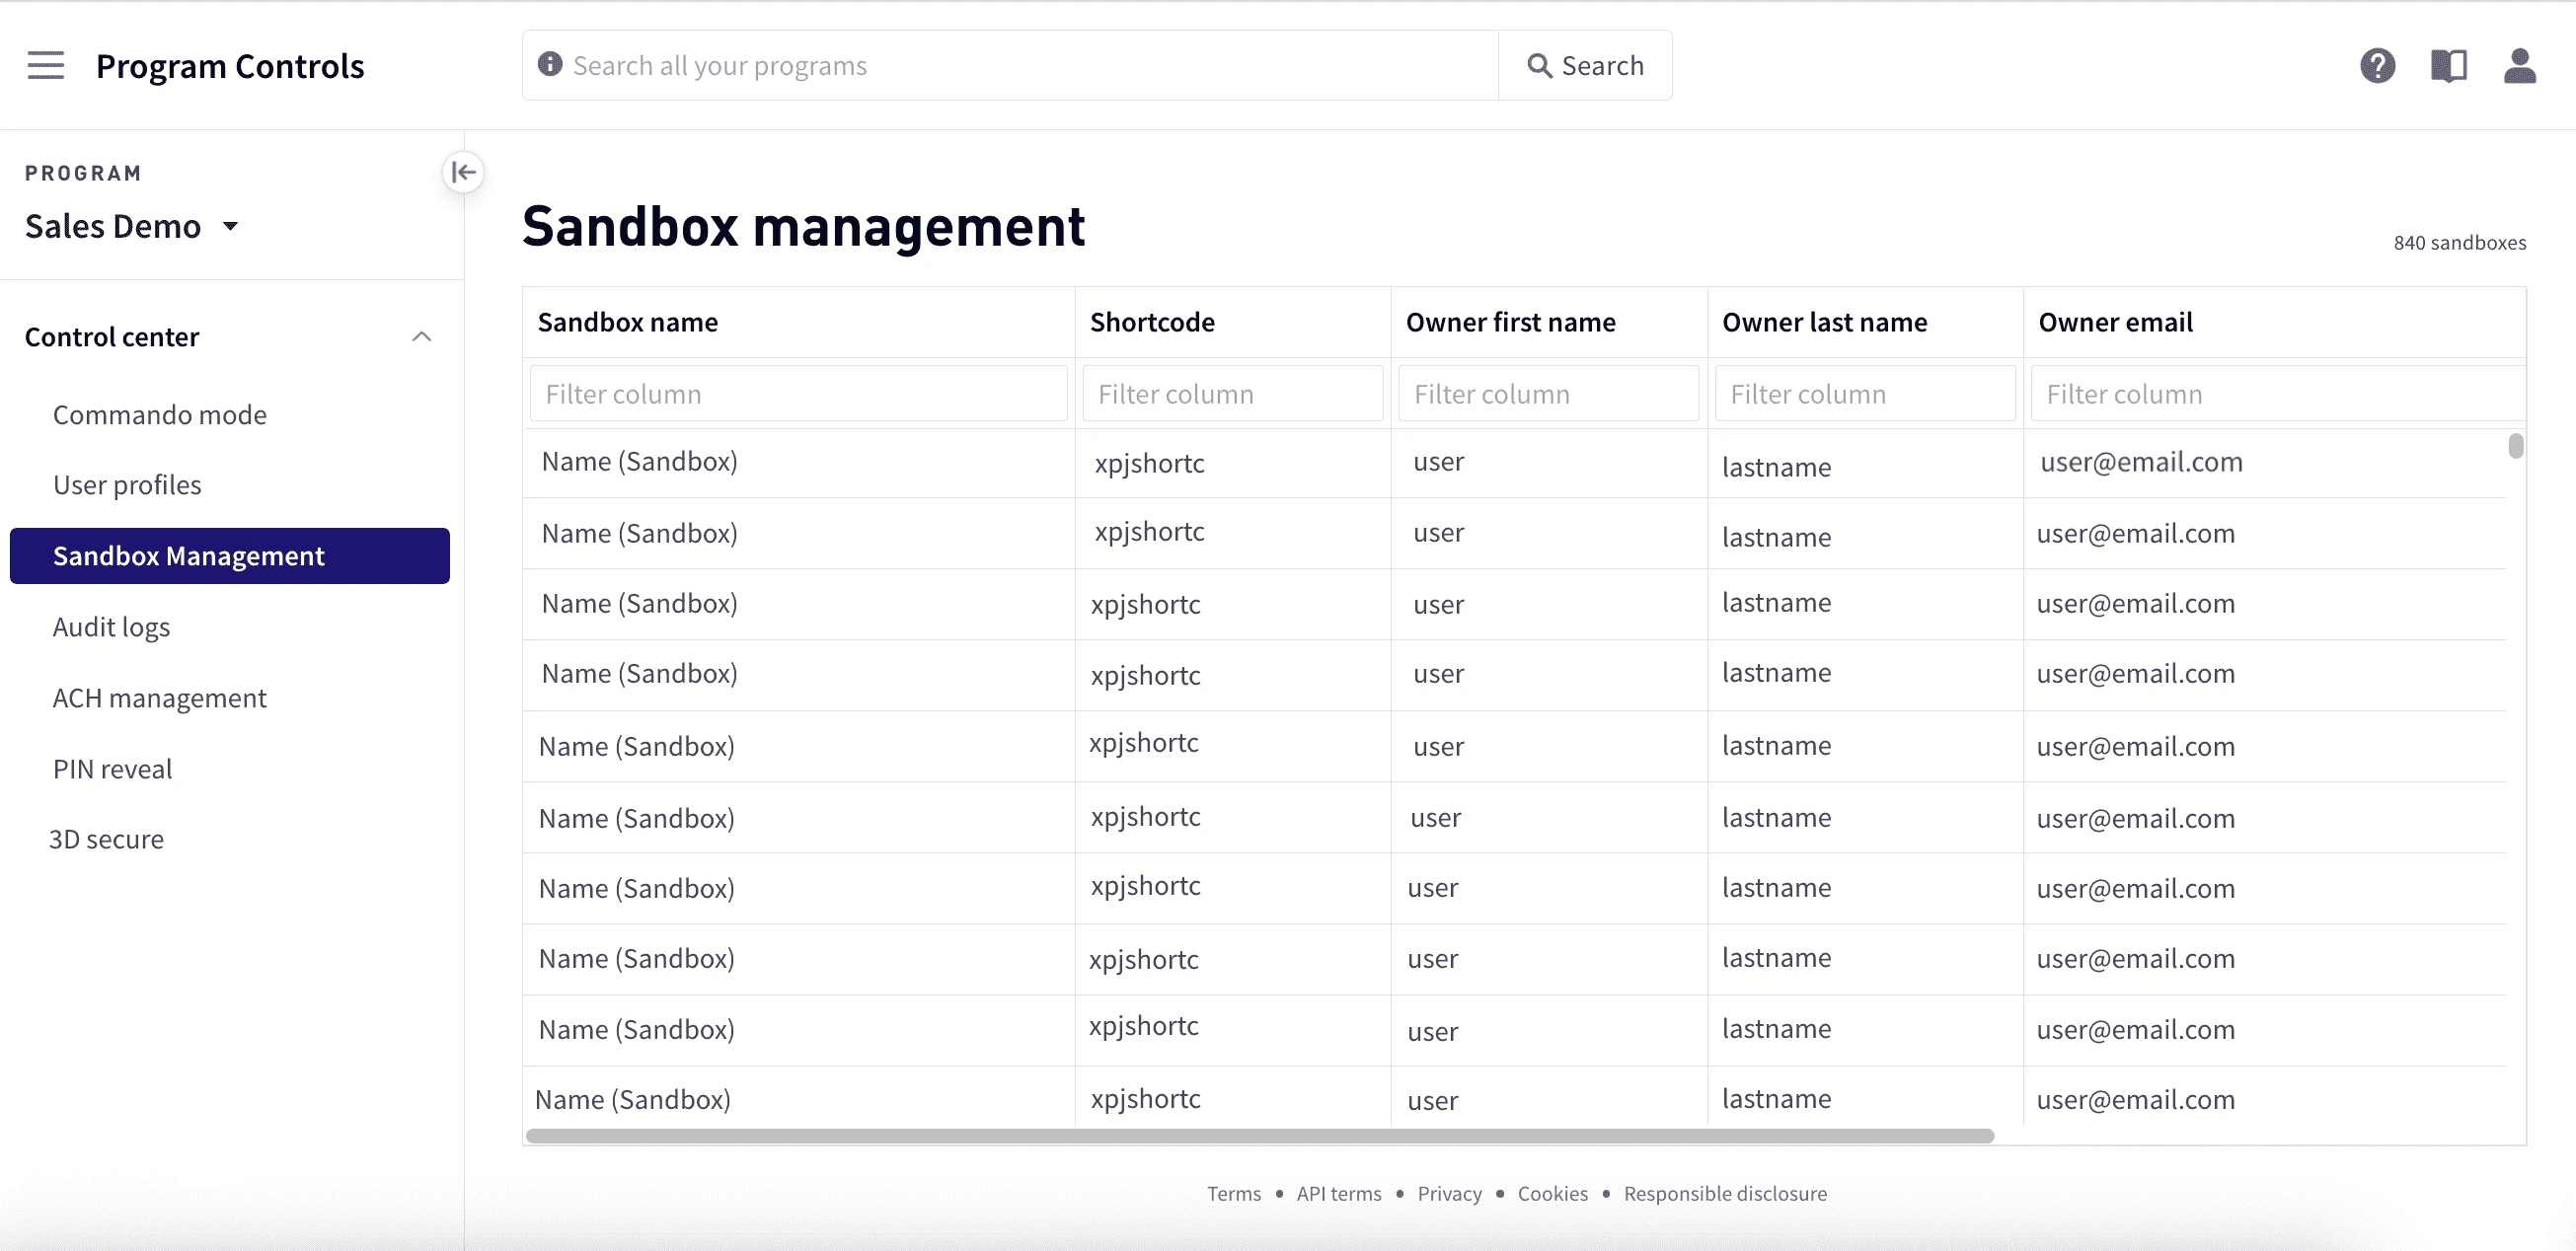
The Departments reflect the organization for a typical business. You can assign one or more departments to a user. The following departments are available:Sandbox management
Note
The sandbox is available for users who have signed up for developer access. For information on signing up as a developer, contact your Marqeta representative.
The sandbox is available for users who have signed up for developer access. For information on signing up as a developer, contact your Marqeta representative.
- Go to Program Controls > Control center > Sandbox management.
Audit logs
As information is modified on the Marqeta platform, such as server names, user names, actions are performed, and data updated, these changes are captured and logged to Marqeta’s central logging service. Audit Logs provides a view of these logs to help you trace the details of these actions. To view audit logs, go to Program Controls > Control center > Audit logs. Audit log records are listed, and include the following information:ACH management
Use ACH management to enable direct deposit for an account. To enable direct deposit:1
Go to Program Controls > Control center > ACH management.
2
Enter the Routing number and Account number prefix.
3
Select Enable.
PIN Reveal
Using PIN Reveal you can display a cardholder’s forgotten PIN to them via your mobile application. With PIN Reveal, the online PIN is less likely to fall out of sync with the PIN stored on the chip because cardholders can reveal their existing PIN instead of resetting it to a new value. Revealing a cardholder’s PIN requires compliance with PCI DSS data security requirements. If you are not PCI certified, use Marqeta’s UX Toolkit to reveal card details to the cardholder and copy these values to the clipboard for later use. You can also view the cardholder’s PIN.Enabling PIN reveal
You must first request that Marqeta enable this feature for your program, then explicitly provision PIN Reveal for the program. To provision PIN reveal:1
After Marqeta has enabled PIN Reveal for your program, go to Control center > PIN reveal.
2
Move the Provision PIN Reveal toggle to the right to activate.
3
Select Save settings. Once PIN reveal is provisioned, you must explicitly opt-in before the feature becomes active.
Viewing PIN Reveal history
PIN Reveal displays the three most recent events in the upper-right. To view a complete PIN Reveal history for the current program, select View full history.3D Secure
3D Secure allows you to provide your customers with an added layer of protection against fraudulent online credit and debit card transactions. Supported by most card issuers, 3D Secure requires cardholders to complete an additional verification step with the issuer before a transaction is authorized. By enabling 3D Secure, you can decrease the number of disputed transactions. 3D Secure boosts customers’ confidence and helps you establish greater trust with them. For more information on 3D Secure, see About 3D Secure. Your customers will verify their transactions using a secure code sent by SMS or email. You can provide a customer support number your customers can call if they have questions or concerns about 3D Secure.Enabling 3D Secure
Your customers will use a one-time passcode (OTP) to verify their transactions, which requires them to enter a secure code sent by SMS or email.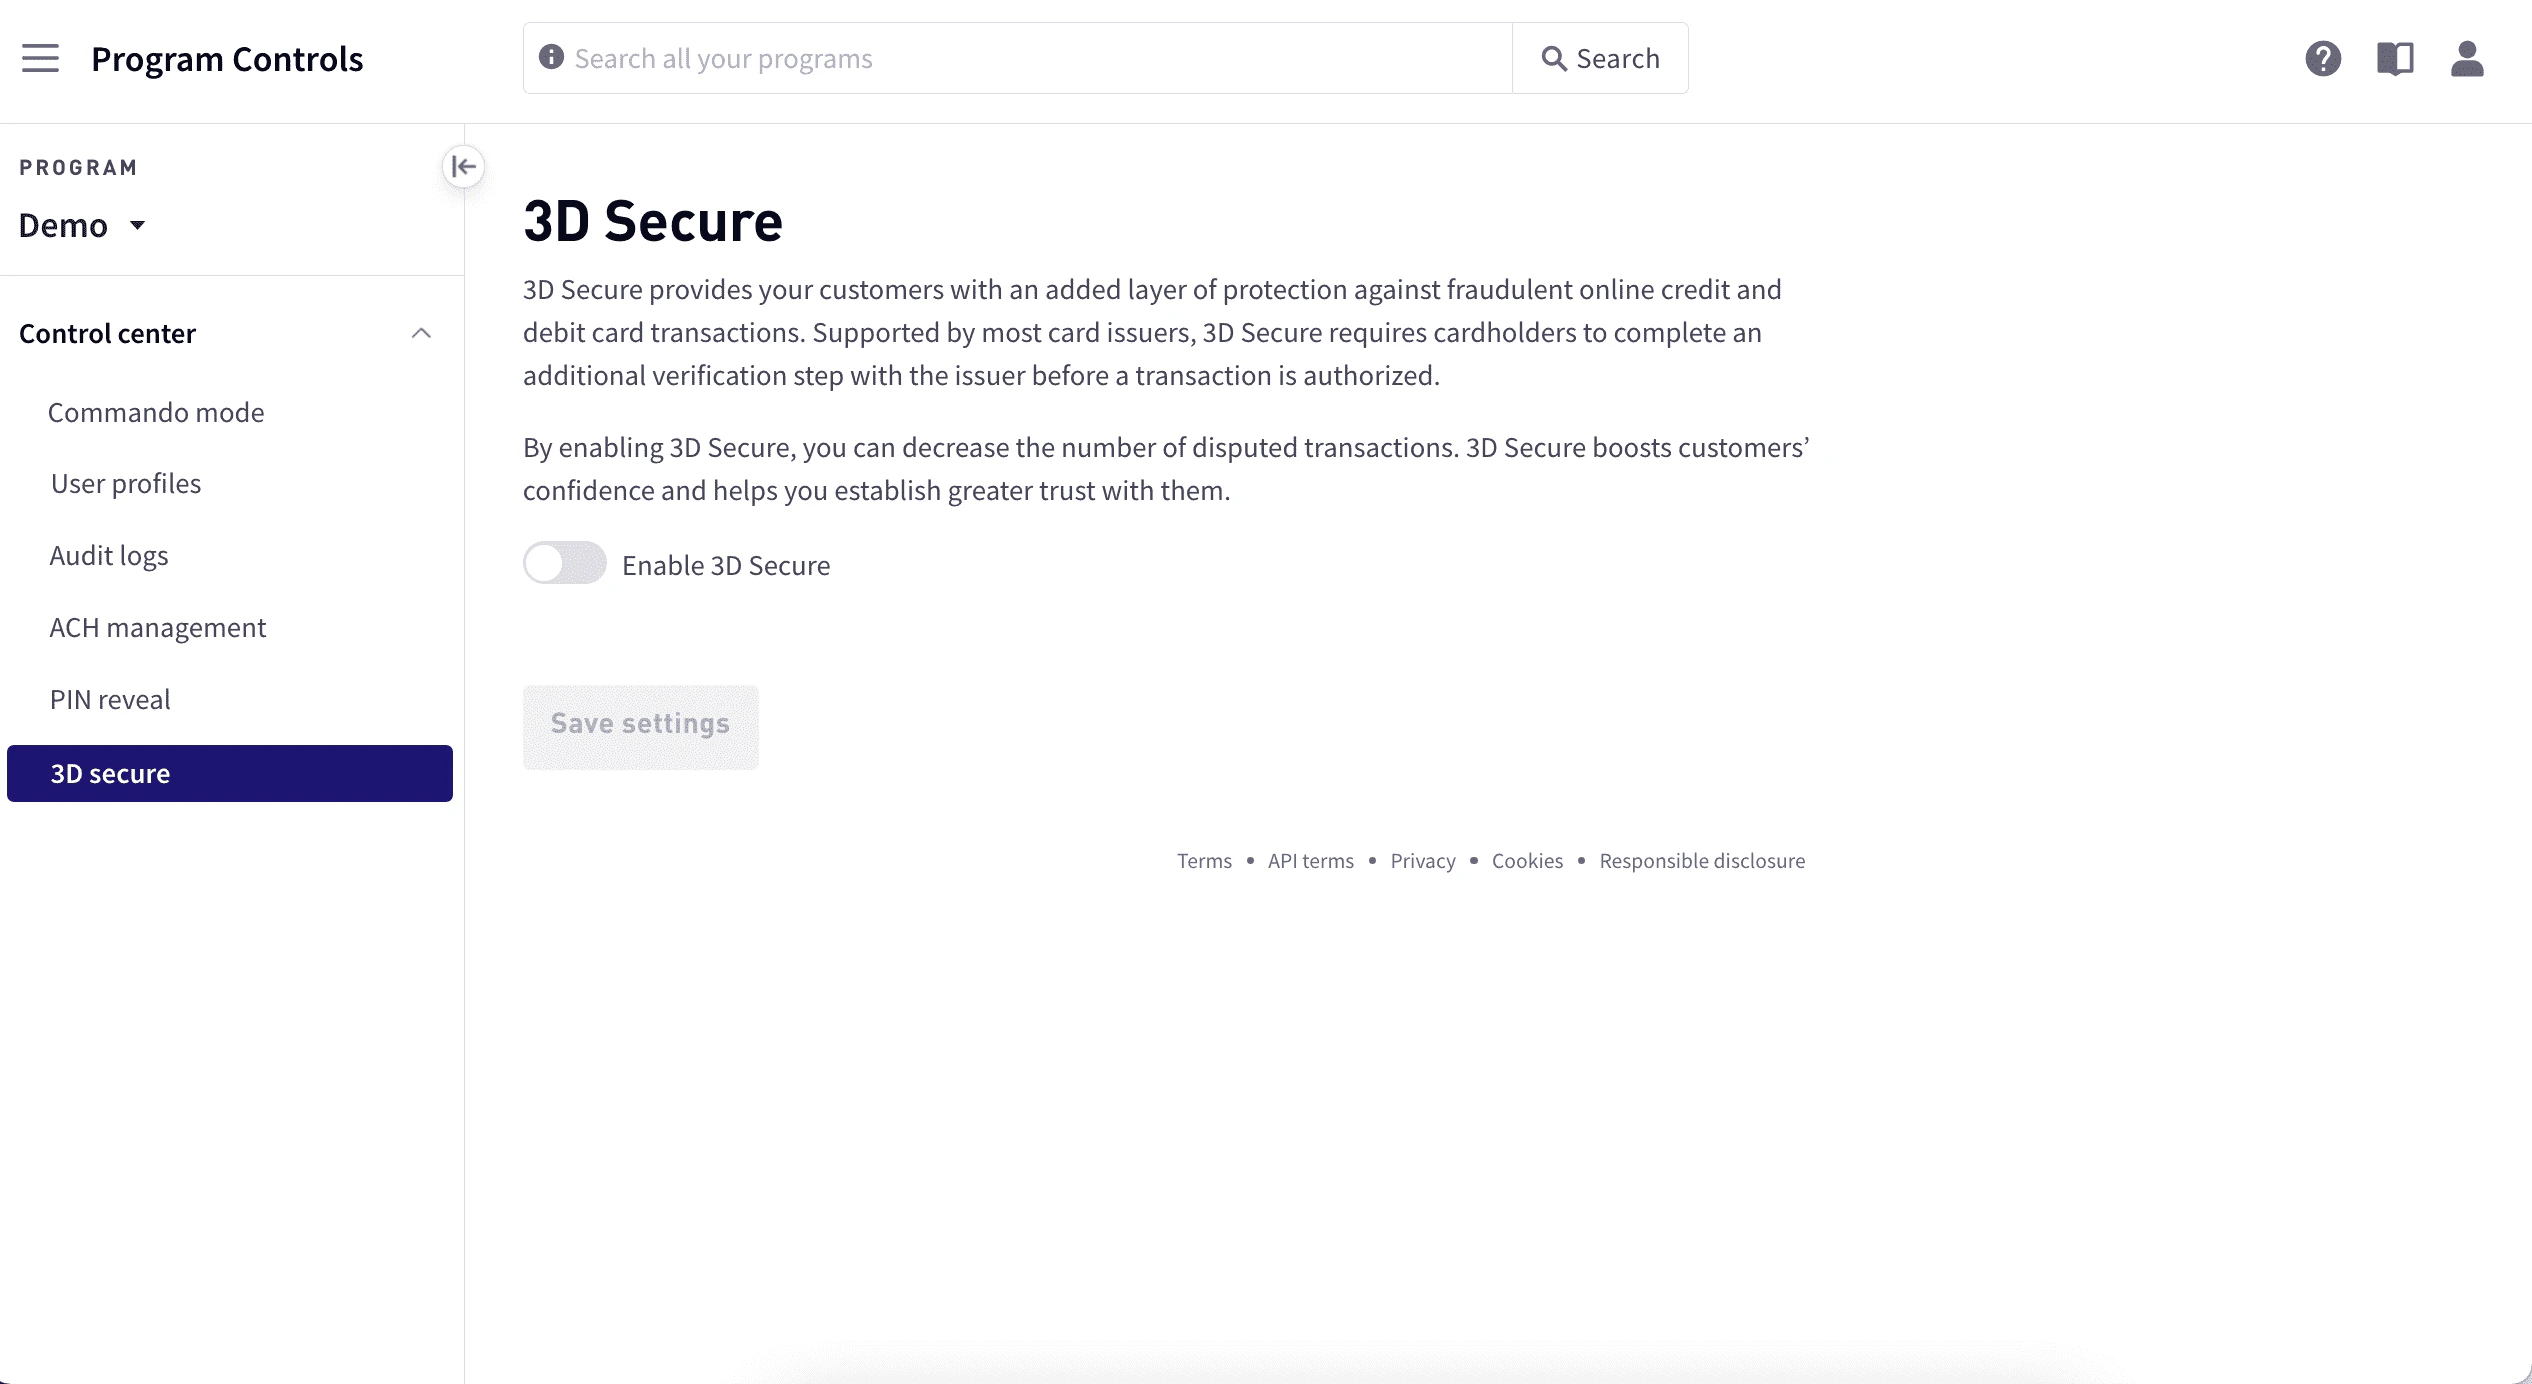
1
Go to Program Controls > Control center > 3D secure.
2
Select Enable 3D Secure.
3
Select the messages versions to support for this program. Support for v1.0.2 is required. You can add additional versions to support. Enabling support for versions other than v1.0.2 provides heightened protection against fraudulent transactions, but requires additional integration work to set up. Support of v2.2.0 is for Visa programs only.
4
To provide a customer support number for your customers to call if they have questions or concerns about 3D Secure, enter a complete number including area code.
5
If you want to provide a no-reply email address, enter an unmonitored email address such as noreply@yourdomain.com from the domain your customers typically associate with your brand. If none is provided, noreply@marqeta.com will be used. A verification link will be sent to this address during initial setup.
6
If you would like an issuer logo to appear in the OTP emails your customers receive, select Upload and choose an image file. Supported formats are .png, .jpeg, .tiff, and .bmp. Maximum file dimensions are 47 pixels (height) x 140 pixels (width). Maximum file size is 5 MB.
3D Secure Decision and Result services
Enable this pair of services to allow Marqeta to manage 3DS strong customer authentication (SCA) decisions for your program.3D Secure Decision service
The 3D Secure Decision Service enables you to configure and implement Marqeta’s 3D Secure decision-making policy instead of developing or hosting your own solution. 3D Secure Decision Service rules determine whether the system applies SCA to an incoming transaction authentication request or exempts it. Enabling this service strikes a balance between your customers’ frictionless experience and the risk of fraud.3D Secure Result service
The 3D Secure Results Service is used to trigger the Marqeta platform to update the result of the cardholder’s SCA challenge. It informs the 3D Secure Decision Service whether or not the strong customer authentication (SCA) has succeeded, which is required to score future transactions by this cardholder more accurately. To enable 3D Secure Decision and Result services, configure your program attributes by providing a URL and login credentials:1
Toggle Enable 3D Secure Decision and Result services to the right.
2
For 3D Secure Decision service program attributes, enter the fully qualified domain name (FQDN) of the endpoint where you want event notifications to be sent, for example https://www.yourdomain.com/webhook. The URL cannot exceed 200 characters in length.
3
Enter the username associated with the user authorized to access the endpoint specified in the Endpoint URL field. The username cannot exceed 500 characters in length.
4
Enter a password for the username used to access the endpoint specified by the Endpoint URL field. The password you choose must be between 8 and 500 characters in length.
5
To use the same program attributes for 3D Secure Results service program that you entered for 3D Secure Decision service program, select the Use my 3D Secure Decision service program attributes checkbox. Otherwise, enter the endpoint URL, username, and password.
Advanced authentication service
Enable Advanced authentication services to allow Marqeta to manage 3DS strong customer authentication (SCA) decisions for your program.1
Toggle Enable Advanced authentication services to the right.
2
Enter the fully qualified domain name (FQDN) of the endpoint where you want event notifications to be sent, for example https://www.yourdomain.com/webhook. The URL cannot exceed 200 characters in length.
3
Enter the username associated with the user authorized to access the endpoint specified in the Endpoint URL field. The username cannot exceed 500 characters in length.
4
Enter a password for the username used to access the endpoint specified by the Endpoint URL field. The password you choose must be between 8 and 500 characters in length.
Developer tools
If you have signed up as a developer, the Dashboard provides tools for integrating with the Marqeta platform so that you can:- Get API keys for your public sandbox.
- View a transaction’s history.
- Manage your webhooks.