Note
For the previous version of User Profiles, see User profiles.
With User Profile Management, you can manage access to the Marqeta Dashboard. Depending on your permissions and access levels, the following tasks can be performed in User Profile Management:

Viewing user information

To view user information, go to Control center > User profiles.
User profile management
The Users tab lists current users along with the following information:
ColumnDescription
EmailThe user’s email address. An invitation to join is sent to this address.
StatusThe user’s status: Active or Disabled.
First NameThe user’s first name.
Last NameThe user’s last name.
Org NameThe user’s organization.
Org TypeThe type of organization, such as Customer, Bank, or Card Network.
ProgramsPrograms whose information the user can view.
Date CreatedThe date that the user was added.
Date UpdatedThe most recent date that the user’s information was updated.
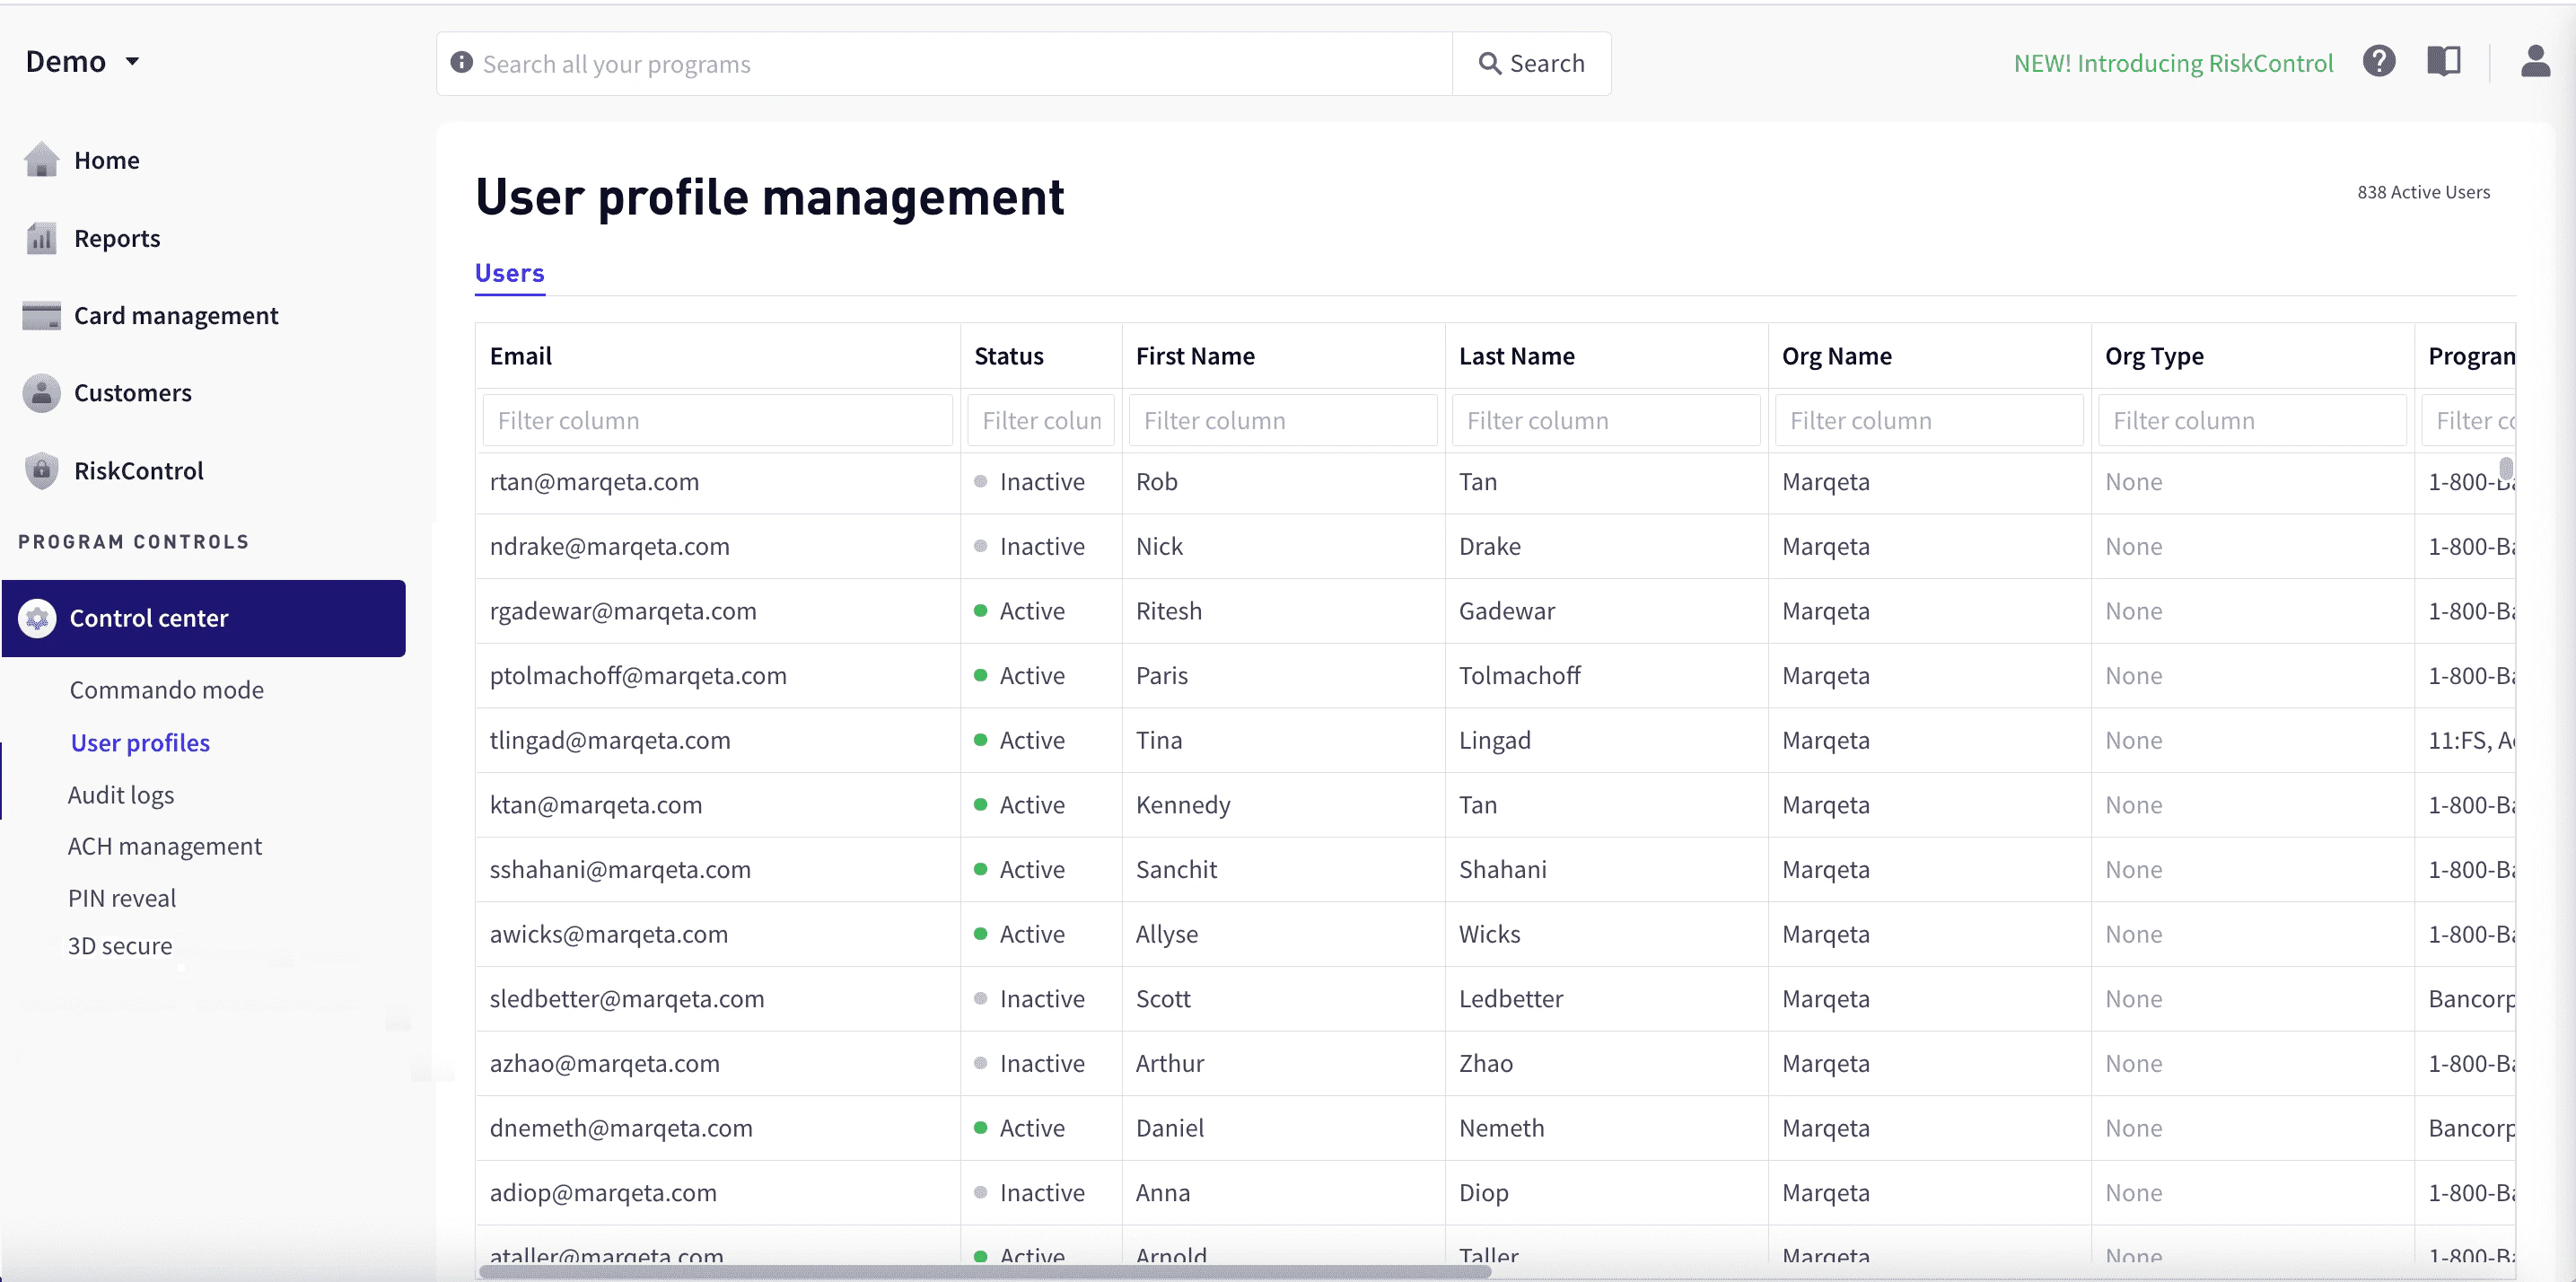
To view additional information, including permissions and access levels, select the user row to display the User profile popup window. For more information on user permissions, see Permissions.

Filtering by column

To filter rows by column, enter the sequence of letters you want to filter on in the text box at the top of the column. As you type, the matching rows are filtered dynamically.

Adding users

To add a user:
1
In the upper-right corner of the dashboard, select Add user.
2
In User details, enter the user’s first and last name and email.
User profile
3
For Multi-factor authentication, choose Authentication via SMS or Authentication via Google authentication. For more information, see Managing multi-factor authentication.
4
Select the user’s organization and the programs the user can access.
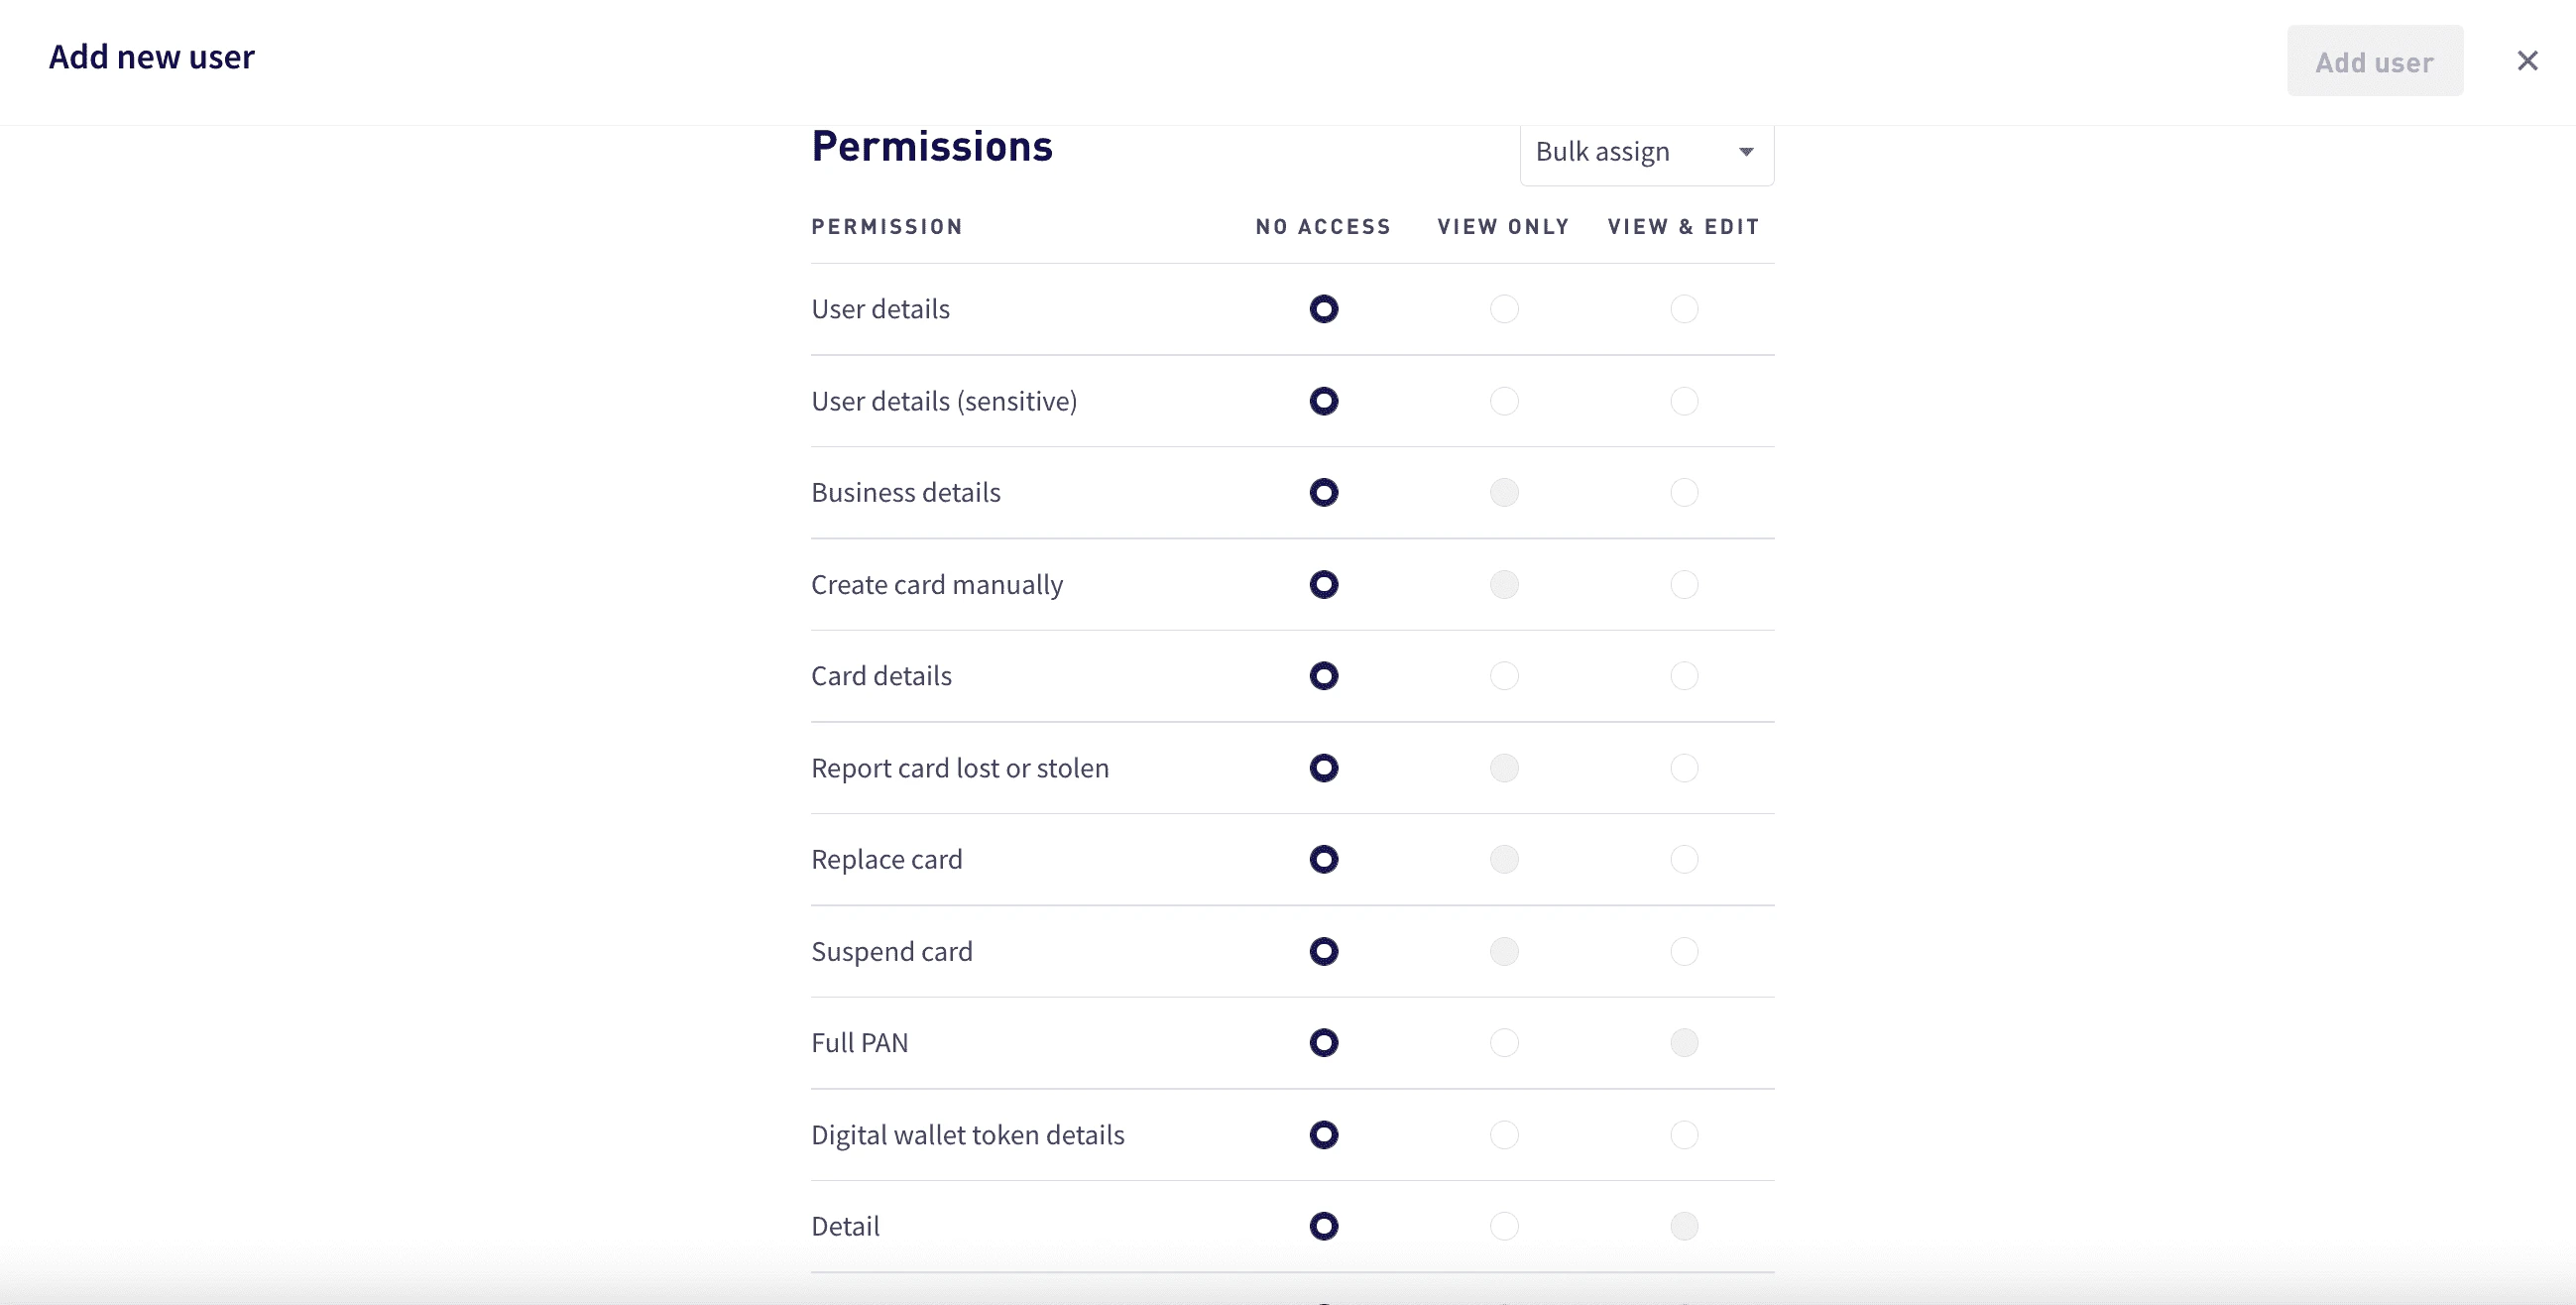
5
To assign permissions, either assign an access level for each permission or use bulk assign:
  • For each permission, select an access level. Access levels that are not available for a permission are grayed.
  • For bulk assign, select Bulk assign and then select the access level for all permissions— No access, View only, or View and edit.
6
Select Add user. The user receives an email invitation to join.
Note
By default, access to personally identifiable information (PII) is denied. Users should be granted the lowest level of access required to fulfill their job responsibilities. Access can only be granted with accordance to your company and the issuing bank’s privacy and information security policies. If a user needs access to PII, contact your Marqeta representative.

Permissions

The following table shows the Marqeta Dashboard permissions and available access levels for each. For details on the specific access that each permission provides, see Access level details.
PermissionAvailable Access LevelsAvailable Access LevelsAvailable Access Levels
Card management
Card productsNo accessView only-
Create card manuallyNo access-View and edit
Card detailsNo accessView onlyView and edit
Report card lost or stolenNo access-View and edit
Replace cardNo access-View and edit
Suspend cardNo access-View and edit
Control center
Invoke Commando ModeNo accessView onlyView and edit
3DS settingsNo accessView onlyView and edit
Audit logsNo accessView only-
Customers
Marqeta Dashboard - Access ManagementNo accessView onlyView and edit
User detailsNo accessView onlyView and edit
User details (sensitive)No accessView onlyView and edit
Account holder detailsNo accessView onlyView and edit
Account holder details (sensitive)No accessView onlyView and edit
Full account numberNo accessView only-
Manage ACHO transfersNo access-View and edit
Cancel ACHO program fundingNo access-View and edit
Business detailsNo accessView onlyView and edit
Full primary account number (PAN) and card verification value (CVV)No accessView only-
Set personal identification number (PIN) (sensitive)No access-View and edit
ACH program fundingNo accessView onlyView and edit
Digital wallets
Digital wallet token detailsNo accessView onlyView and edit
Program controls
Program configurationNo access-View and edit
Granular permissionsNo accessView only-
Inventory managementNo access-View and edit
Reports
AnalyticsNo accessView only-
ComplianceNo accessView only-
DetailNo accessView only-
Cross border feesNo accessView only-
Currency conversion feesNo accessView only-
InterchangeNo accessView only-
StoriesNo accessView only-
Personal identifiable informationNo accessView only-
3DS reportingNo accessView only-
Commercial creditNo accessView only-
Loads settlement dateNo accessView only-
PIN interchangeNo accessView only-
Risk Control
Transaction review managerNo access-View and edit
DisputesNo access-View and edit
Process disputes (EU only)No access-View and edit
Other
Return direct depositNo access-View and edit

Access level details

The following table shows the specific access in the dashboard granted for each permission and access level:
PermissionAccess Level Details
Card management
Card productsView only – Users with this permission can:

- View all card products available in the program.
- View the card product details and spend controls for each card product in the program.
Card detailsView only – Users with this permission can:

- View all information in the Card Details section except full PAN.
- View card transaction, history, card transitions, and digital wallet tokens summary.

View and edit – Activate and terminate a card.
Report card lost or stolenView and edit – Complete the report card workflow for a lost or stolen card in the Card Details section.
Replace cardView and edit – Complete the replace card workflow in the Card Details section.
Suspend cardView and edit – Complete the lock card workflow in the Card Details section.
Control center
Invoke Commando ModeView only – View all Commando Mode configurations.

View and edit – Enable or disable all available Commando Mode configurations for the program.
3DS settingsView only – View 3DS settings and configurations for the program.

View and edit – View the 3DS settings and edit the configurations for the program.
Audit logsView only – View Marqeta Dashboard user action history for the program.
Customers
Marqeta Dashboard - Access ManagementView only – Provides view access to the User Profile Management dashboard. Users with this permission can see a list of Marqeta Dashboard users.

View and edit – In addition to viewing the User Profile Management dashboard, users with this permission can edit user profiles and permissions. Possible access includes the ability to:

- Create user profiles with required permissions.
- Edit user profiles.
- Edit and reset multi-factor authentication.
- Assign permissions and programs to other dashboard users.
User detailsView only – Users with this permission can:

- View all information in the User Details section except identification information.
- View the cardholder’s associated cards, digital wallet tokens, and transactions summary but not all the card details, token details, and transaction details.

View and edit – Users with this permission can:

- View and edit all information in the User Details section except identification information.
- Change status of the user and add notes.
User details (sensitive)View only – View all identification information in the User Details section.

View and edit – View and edit all identification information in the User Details section.
Account holder detailsView only – Users with this permission can:

- View all information in the Account Holder Details section except personally identifiable information.
- View the account holder’s associated cards, digital wallet tokens, and transactions summary but not all the card details, token details, and transaction details.

View and edit – Users with this permission can:

- View and edit all information in the User Details section except personally identifiable information.
- Change status of the user and add notes.
Account holder details (sensitive)View only – View all information in the Account Holder Details - Identification section, including personally identifiable information.

View and edit – View and edit all information in the Account Holder Details - Identification section, including personally identifiable information.
Full account numberView only – View all information in the Account Holder Details - Identification section, including personally identifiable information.
Manage ACHO transfersView and edit – View and edit all information in the Account Holder Details - Identification section, including personally identifiable information.
Cancel ACHO program fundingView and edit – View previous ACH transfers and create new ACHO program funding transfers.
Business detailsView only – Users with this permission can:

- View all information in the Business Details section except sensitive information.
- View the business’ associated child users, digital wallet tokens, and transactions summary but not all the user details and token details.

View and edit – Users with this permission can:

- View and edit most information in the Business Details section except for customers using KYB with Marqeta.
- Change status of the user and add notes.
- Add notes to the business.
Full PAN and CVVView only – View full PAN in the card art and the Card Details section.
Set PIN (sensitive)View and edit – Set PIN for all card in assigned programs.
ACH program fundingView only – View the ACH Program Funding page and the ACH Transfers table for the program.

View and edit – View previous ACH transfers and create new ACHO program funding transfers.
Digital wallets
Digital wallet token detailsView only – View all information in the Digital Wallet Tokens section except full PAN.

View and edit – Activate, suspend, and terminate digital wallet tokens.
Program controls
Program configurationView and edit – Users with this permission can:

- View and edit programs, card products, accepted countries, MCC groups, and application tokens.
- Edit and submit configurations to the Approval queue.
Reports
DetailView only – View detailed transaction-level data in the Reports section.
Cross border feesView only – View cross border fees in the Reports section.
Currency conversion feesView only – View currency conversion fees in the Reports section.
InterchangeView only – View the sig_interchange and chargebacks_interchange columns in the Clearing Detail report.
StoriesView only – Create charts and visuals.
Personally identifiable information (PII)View only – View cardholders’ personally identifiable information (PII).
3DS reportingView only – View the 3DS ACS report.
Commercial creditView only – View credit balances by day and hour.
Risk Control
Transaction review managerView and edit – Review transactions and initiate transaction alerts.
DisputesView and edit – Initiate disputes.
Process disputes (EU only)View and edit – Manage and process disputes.
Other
Return direct depositView and edit – Reverse direct deposits.

Resending an invitation

To resend an invitation:
1
Go to Control center > User profiles, and select the row for the user.
2
In the User profile pane, select Resend Invite.

Editing user information

To edit a user’s information:
1
Go to Control center > User profiles, and select the row for the user.
2
At the bottom of the User profile pane, select Edit user.
  • Update any of the user’s basic information, or add and remove programs, permissions, or access levels as necessary. For more information, see Permissions.
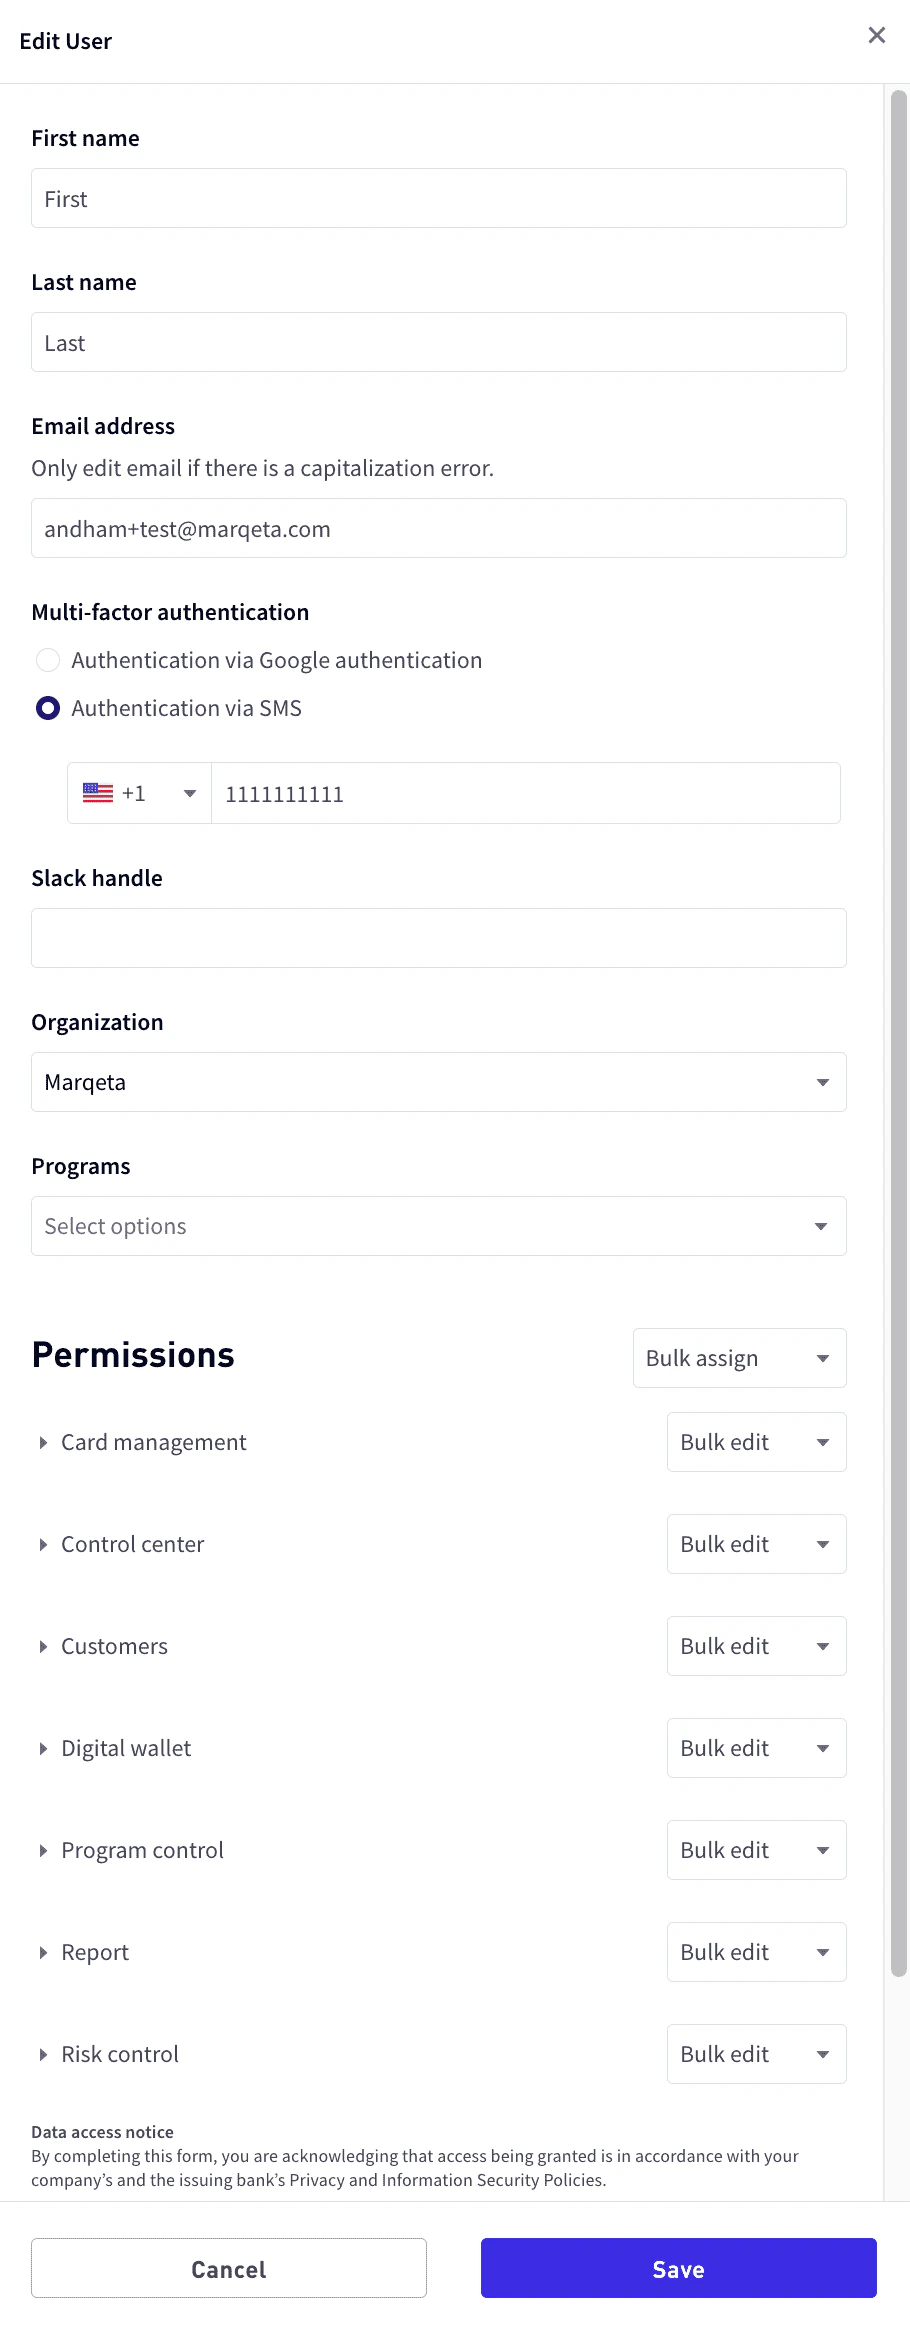
    Edit user
3
Select Save.

Enabling and disabling users

To enable or disable a user:
1
Go to Control center > User profiles, and select the row for the user.
2
At the bottom of the User profile pane, select Edit user.
3
For the Status, select Active or Inactive.
4
Select Save.

Managing multi-factor authentication

Multi-factor authentication (MFA) is an authentication method that requires the user to provide two or more verification factors to gain access. Marqeta Dashboard requires users to have MFA enabled via SMS or Google’s Time-based One Time Password (TOTP) authenticator. To reset or manage a user’s MFA options, you must have the View and Edit access level for the User Profiles privilege.

Resetting multi-factor authentication

You should reset the user’s MFA when a user:
  • Changes their phone number and needs to authenticate using a new phone number using SMS.
  • Changes their mobile device and needs to authenticate using a new device with Google authenticator.
  • Deletes their Google authenticator code and needs to rescan the QR code using the same device.
If SMS is chosen, resetting MFA clears the phone number and allows a new phone number to be entered for the user. If Google authenticator is chosen, resetting MFA redisplays the QR code. If the user had SMS MFA enabled and you’ve reset their MFA, the user is prompted to enter a new phone number when they sign in. If the user had Google Authenticator MFA enabled and you’ve reset their MFA, the QR code is displayed again for the user to scan. To reset a user’s MFA:
1
Go to Control Center > User Profiles.
2
From the list of users, select the user’s row.
3
At the bottom of the User Profile pane, select Edit user to open the User profile panel.
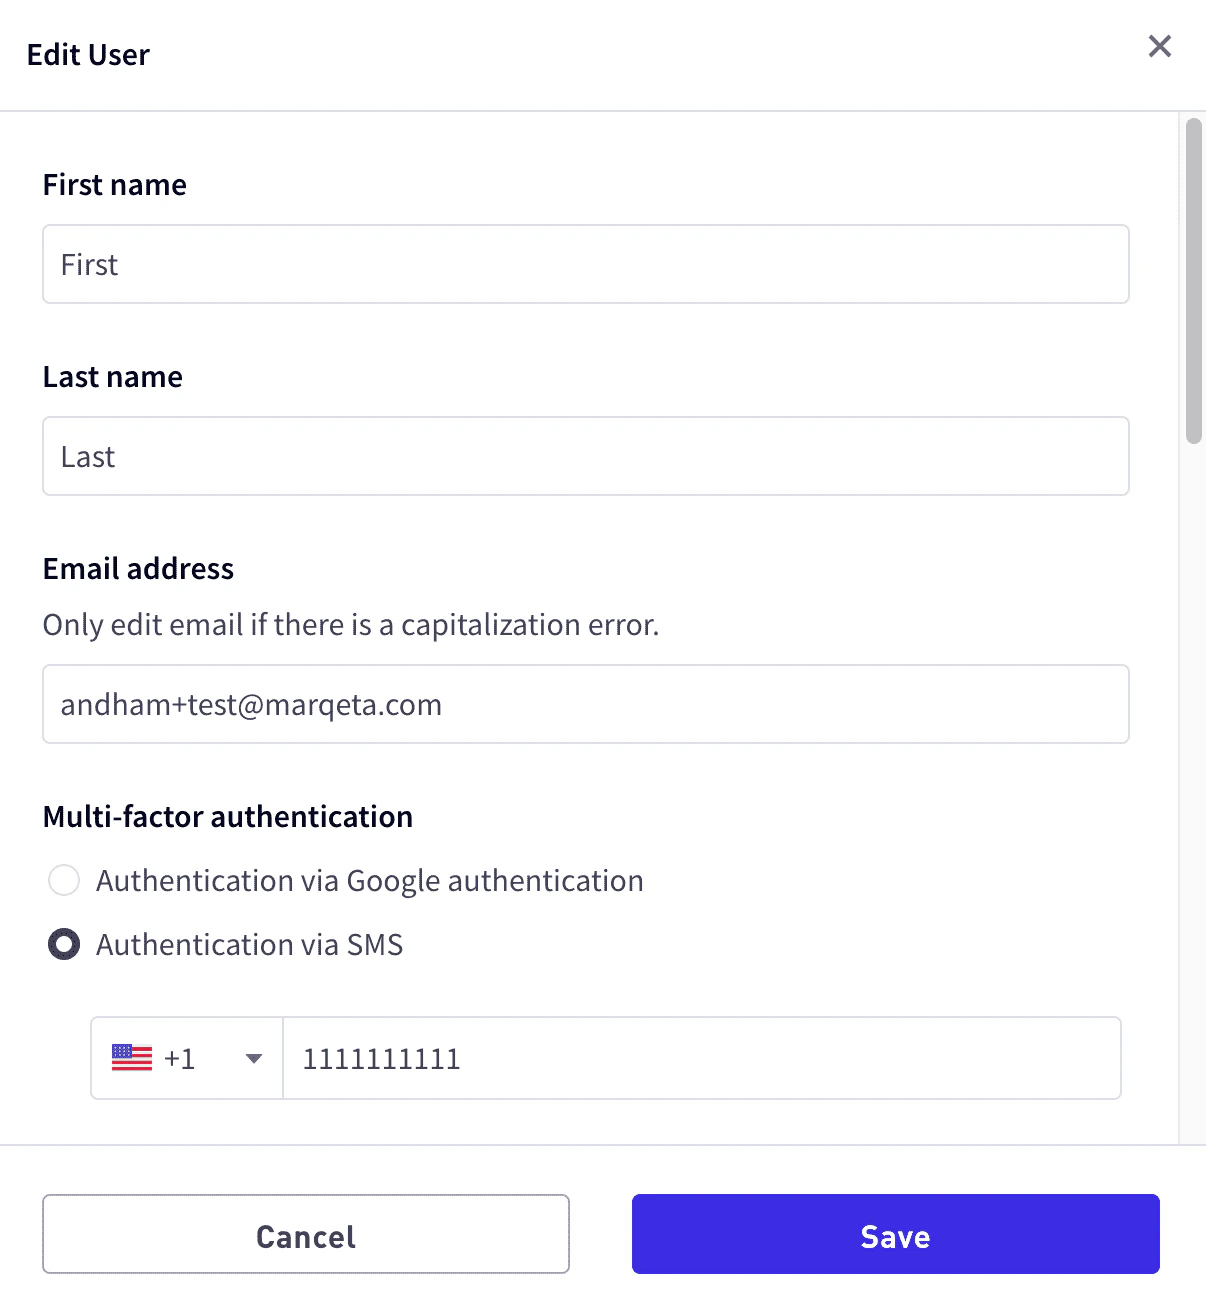
Edit user
4
In the Multi-factor authentication section, select either Authentication via Google authentication or Authentication via SMS.
5
Select Save.

Switching a user’s MFA option

A user’s MFA option can be switched between SMS and Google Authenticator. Switch a user’s MFA option when the user:
  • Is not receiving SMS messages and would like to switch to Google Authenticator.
  • Is an international user who doesn’t use a US phone number and has trouble receiving SMS.
  • Would like to switch from SMS to Google Authenticator or switch from Google Authenticator to SMS.
To switch a user’s MFA option:
1
Go to Control center > User Profiles.
2
From the list of users, select the user’s row.
3
At the bottom of the User Profile pane, select Edit User.
4
In the Multi-factor authentication section, select either Authentication via Google authentication or Authentication via SMS.
5
Select Save.
If the user had Google Authenticator enabled and has switched to SMS, the user will be prompted to enter a phone number when they sign in. If the user had SMS authentication enabled and has switched to Google Authenticator, the QR code will be displayed for the user to scan.

Accessing the Dashboard using MFA

Note
This section describes how users can access the Marqeta Dashboard using multi-factor authentication.
To access the Marqeta Dashboard, go to app.marqeta.com in your browser. If your organization has implemented multi-factor authentication (MFA), you are required to confirm your identity using either SMS or email when you log in. For SMS, you will need to enter the six-digit code that you receive on your phone into the login window. For Google Authenticator, you will need to follow the Google Authenticator process.

Resetting your MFA access

In some cases, your MFA access may need to be reset—for example, if your device has been lost or stolen. In that case, contact your system administrator to reset your MFA access.

Resetting MFA for SMS

If you have SMS MFA enabled and have requested a reset:
1
When you attempt to sign into the dashboard, you are prompted to enter a new phone number.
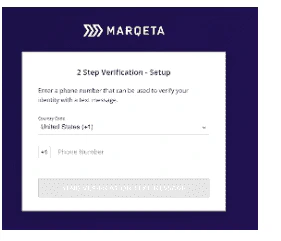
Reset SMS access
2
Enter your phone number and select SEND VERIFICATION TEXT MESSAGE.

Resetting MFA for Google Authenticator

If you have Google Authenticator MFA enabled and have requested a reset:
1
When you attempt to sign into the dashboard, a QR code is displayed.
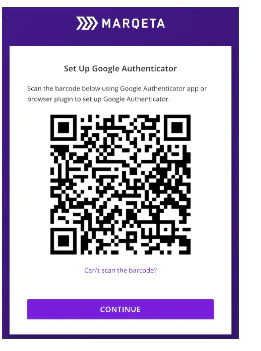
Reset email access
2
Scan the QR code and select Continue.

Switching your multi-factor authentication option

If you want to switch your MFA option, send a request to your system administrator. You will be prompted to register using either the SMS or Google Authenticator procedure described above.

Enabling single sign-on authentication

Single sign-on (SSO) is an authentication method that allows users to log in to multiple applications with one set of credentials. SSO reduces security overhead for system administrators by allowing users to delegate authentication to their external Security Assertion Markup Language 2.0 (SAML 2.0) Identity Provider (IdP) and eliminating the need for users to maintain a separate password to log in to Marqeta Dashboard. When you enable SSO, SSO becomes the exclusive method for your users to log in to Marqeta Dashboard. SSO implementation is based on email domain, so after your email domain is onboarded to SSO, your new and existing users will be automatically provisioned for SSO. You will follow the existing process to add a user in Marqeta Dashboard. Your users will then access Marqeta Dashboard using SSO. If you are a system administrator and prefer your users use SSO, contact your Marqeta representative. Note that email aliases are not valid for SSO with Marqeta Dashboard. Users who use email aliases to access Marqeta Dashboard will lose access after SSO is enabled, so consult with your Marqeta representative if your organization includes such users.

Setting up single sign-on authentication

To set up SAML 2.0 authentication in Marqeta Dashboard:
1
Share the service provider with your Marqeta representative.Marqeta will provide you with two URLs, one for SSO and another for audience restriction.
2
Add the URLs to your IdP system, which will generate an IdP metadata URL.
3
Share the IdP metadata URL with your Marqeta representative.Marqeta will update the service provider record with the IdP metadata URL.

Accessing the Dashboard using SSO

This section describes how users can access the Marqeta Dashboard using single sign-on (SSO) authentication.
Note
The Marqeta Dashboard does not currently support IdP-initiated login flows. Marqeta Dashboard users who log in with SSO methods cannot use the application link on their IdP dashboard to log in.
To access the Marqeta Dashboard, go to app.marqeta.com in your browser. If your organization has implemented single sign-on (SSO) authentication, you are required to log in using SSO. You will be redirected from Marqeta Dashboard to your SSO login page to enter your credentials and authenticate. After successfully authenticating, you will be redirected back to Marqeta Dashboard. Note that email aliases are not valid for SSO with Marqeta Dashboard.