Note
This feature is currently in beta and subject to change. It also requires additional activation steps. To learn more about the Beta program for this feature and about activating it for your program, contact your Marqeta representative.
This feature is currently in beta and subject to change. It also requires additional activation steps. To learn more about the Beta program for this feature and about activating it for your program, contact your Marqeta representative.
- Create a dispute.
- Manage dispute progress.
- Transition a dispute.
- Create disputes in bulk (Visa only).
The basics
To manage disputes, log into the Marqeta Dashboard, select Dashboard in the upper-left corner, and then select RiskControl > Disputes from the sidebar. For more on accessing the Marqeta Dashboard, see Accessing the Marqeta Dashboard.How to…
- View current disputes
- View dispute details
- Create a dispute case
- Create dispute cases in bulk
- Manage dispute cases
- View the chargeback report
- Report fraud
Viewing current disputes
To view the current disputes, select Dashboard in the upper-left corner, and then select RiskControl > Disputes from the sidebar. The current disputes are displayed in the Dispute queue tab.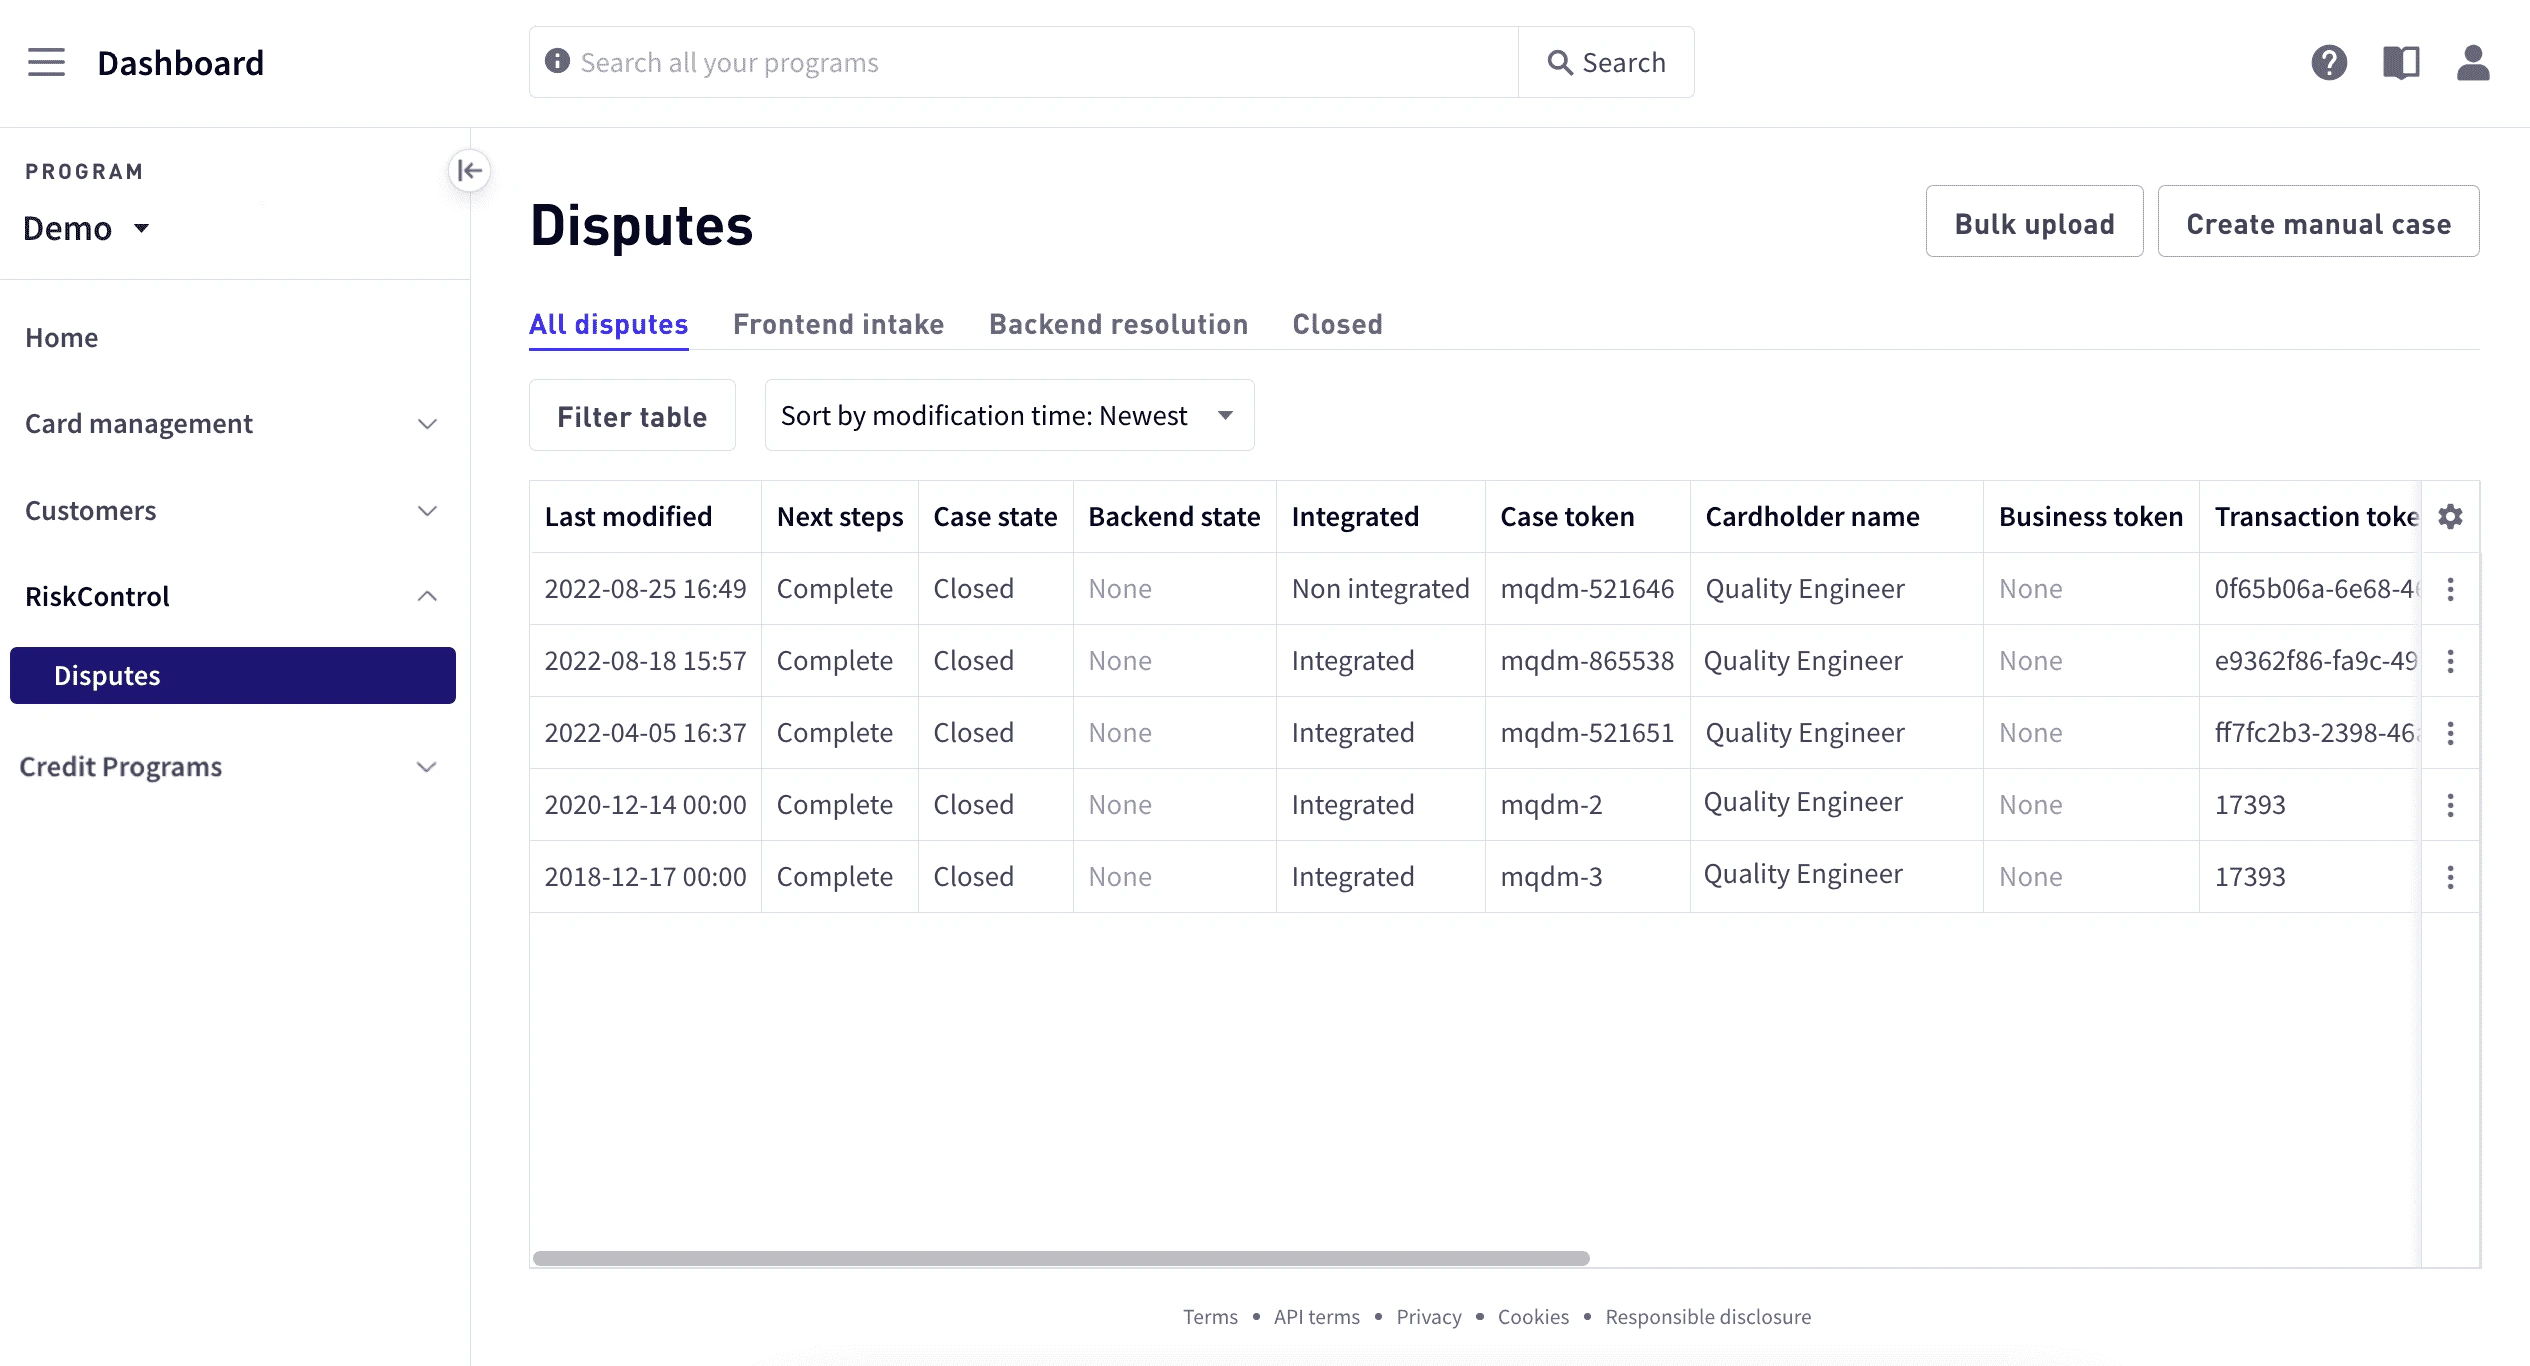
Searching for users, businesses, cards, or disputes
Use the Search bar at the top of the view area to search for users, businesses, cards, or dispute cases. You can search for users by account number or user token. For businesses, cards, and dispute cases, search by token. To use the Search bar:1
Enter the token in the search box and select Search.
2
Select the item in the search result below the search box. The requested entity opens in the appropriate area of the Dashboard.
Filtering disputes
You can filter disputes by case state, transaction or cardholder token, dispute amount, case assignee, dispute reason, reason code, actor, or whether a dispute is integrated. You can sort by created time or time modified. To filter disputes:1
In RiskControl > Disputes, select Filter table.
2
Enter the values you want to use for the filter.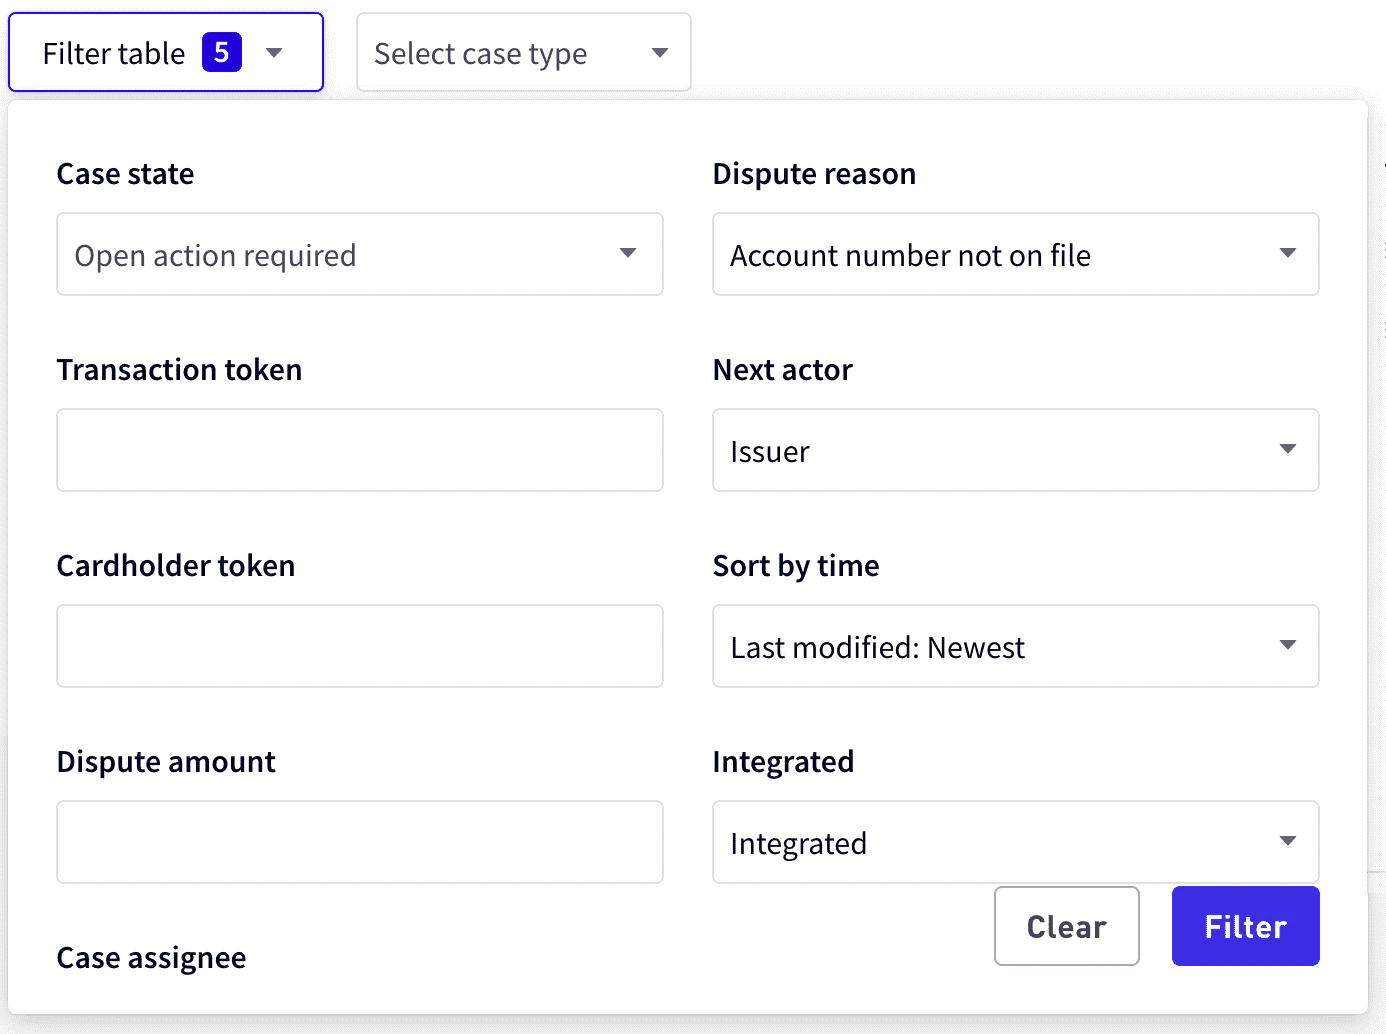
3
Select Filter.
1
All disputes – All current disputes.
2
Frontend intake – Disputes in the Ready, Open, or Open action required state.
3
Backend resolution – Disputes that have been sent to the card network.
4
Closed – Disputes that are resolved and closed.
Setting the columns to display and column order
To customize the column display:1
In Dashboard > RiskControl > Disputes, select the gear icon in the upper-right corner of the list, and choose Modify columns.
2
In Customize Columns, select the columns you want to display.
3
To change the display order, select and hold the row and move it to the new position.
4
Choose Save.
Viewing dispute details
In Dispute details, you can update the dispute details, view cardholder information, view a transition history, or mark the dispute case as ready. For details on how to do this, see Managing Dispute Cases.Note
The specific details displayed vary depending on the current state of the dispute case.
The specific details displayed vary depending on the current state of the dispute case.
1
Go to Dashboard > RiskControl > Disputes and select the dispute, or select See details from the vertical ellipsis icon at the right of the row. Details are displayed in the Submission details tab.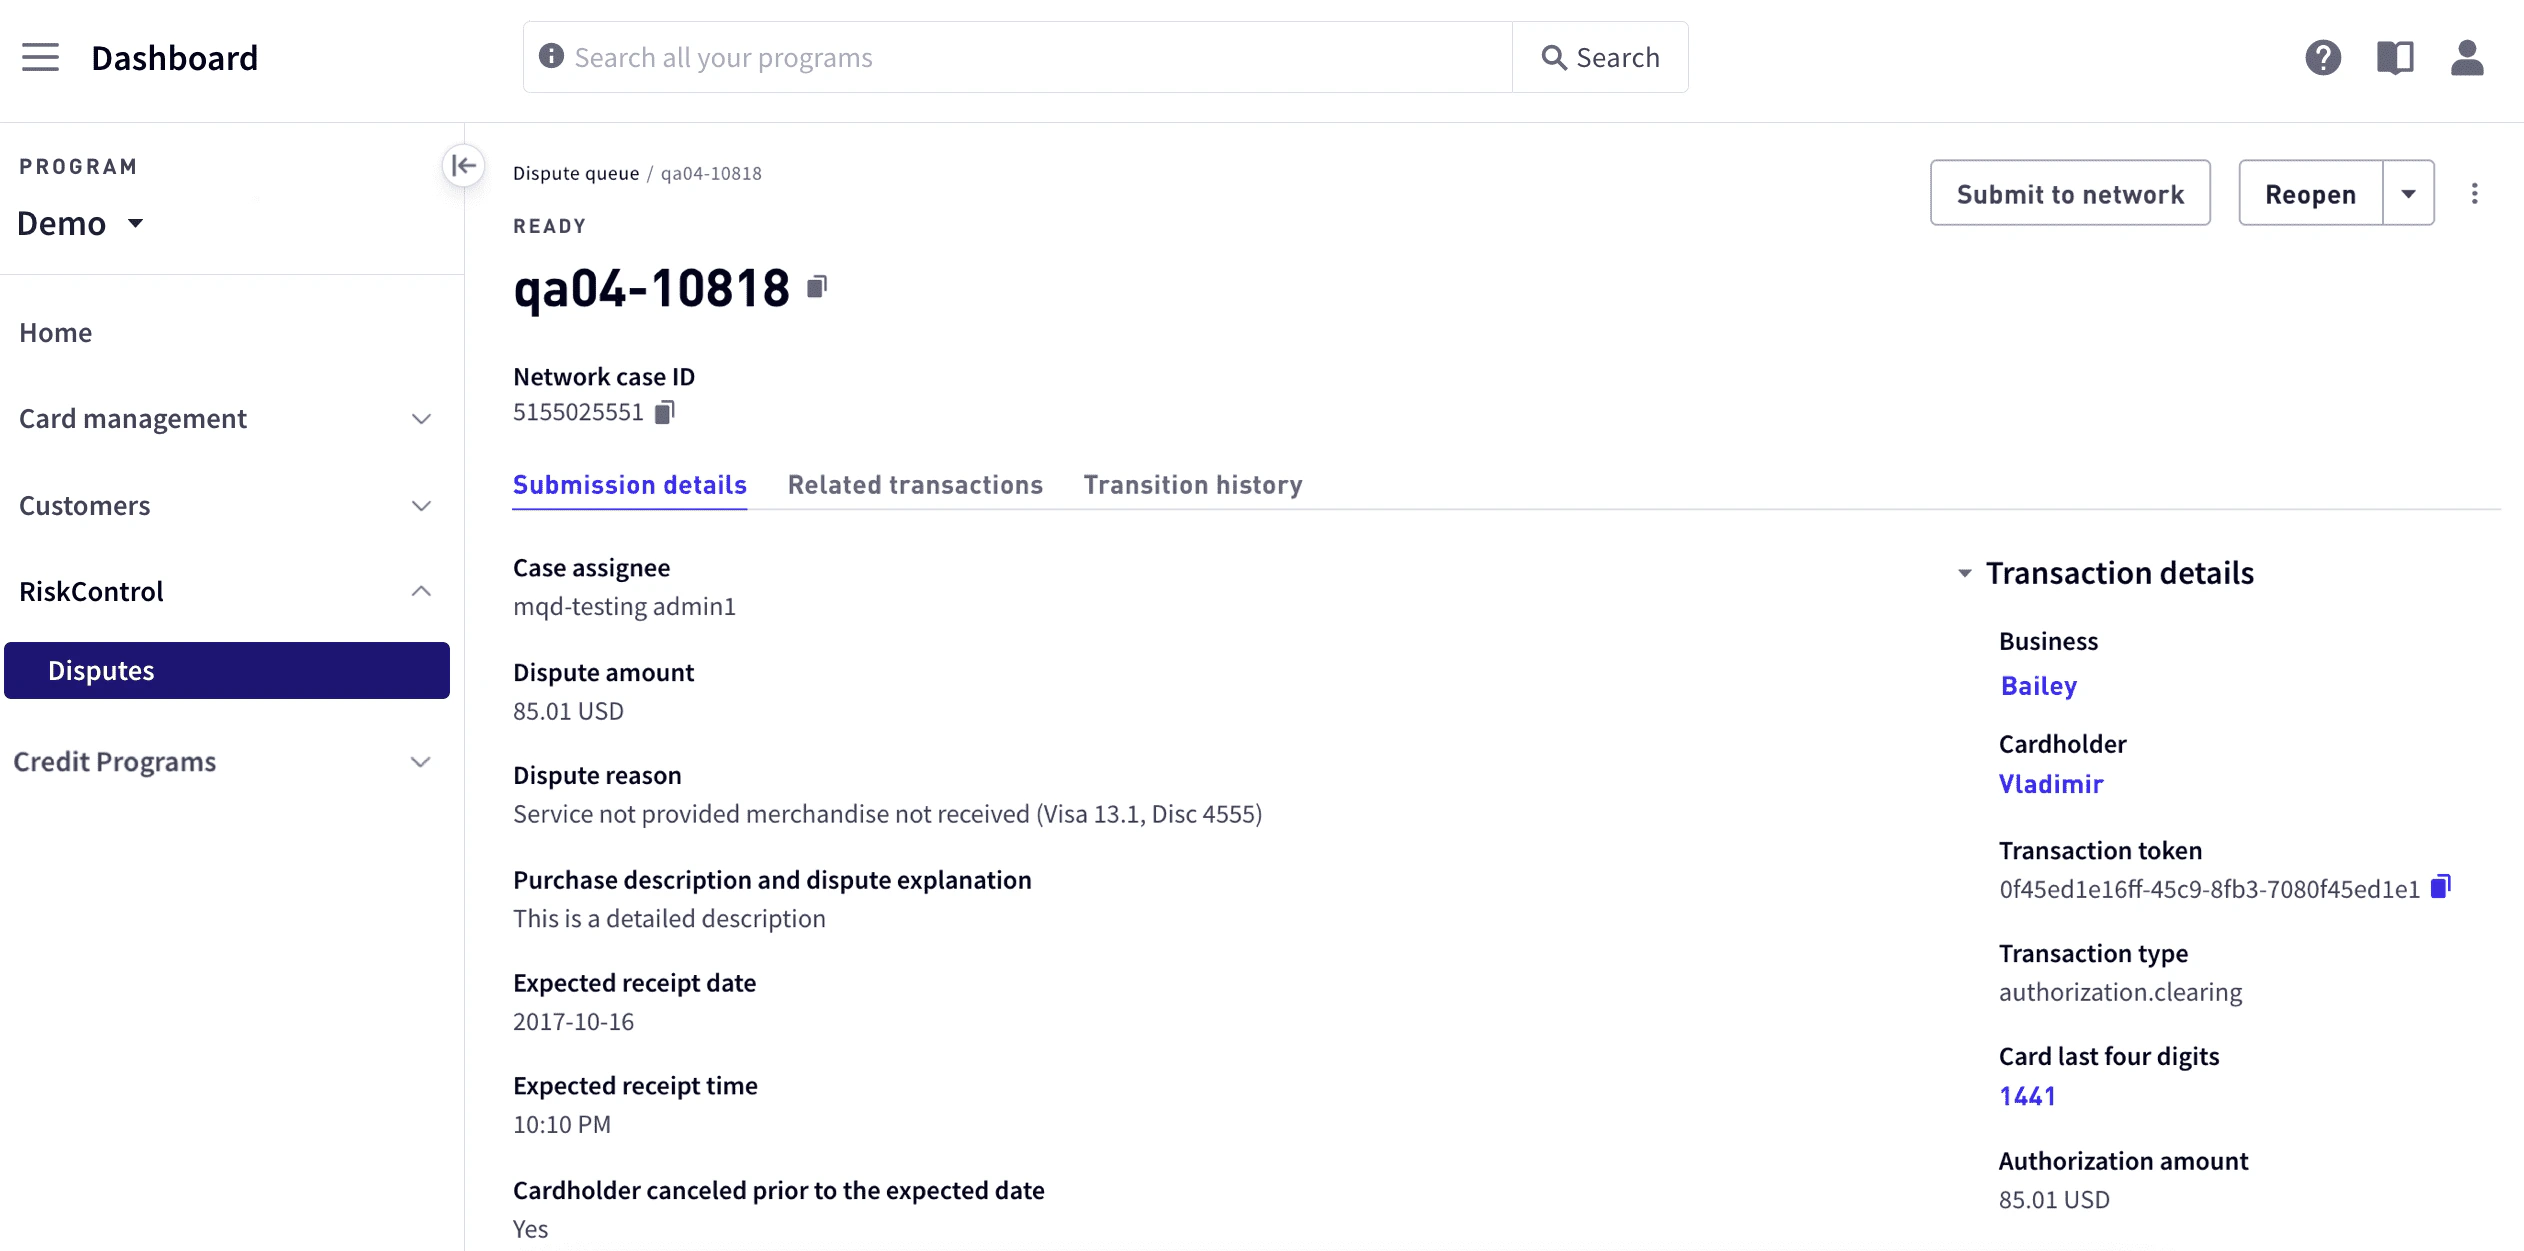
2
To see detailed information about the transaction including cardholder information, select the arrow in front of Transaction details to the right of the view area.
3
To view point-of-sale details, select the arrow in front of Point of Sale details in the lower right.
Viewing related transactions
To view related transactions:1
Go to Dashboard > RiskControl > Disputes.
2
Select the dispute or select See details from the vertical ellipsis icon at the right of the row.
3
Select the Related transactions tab.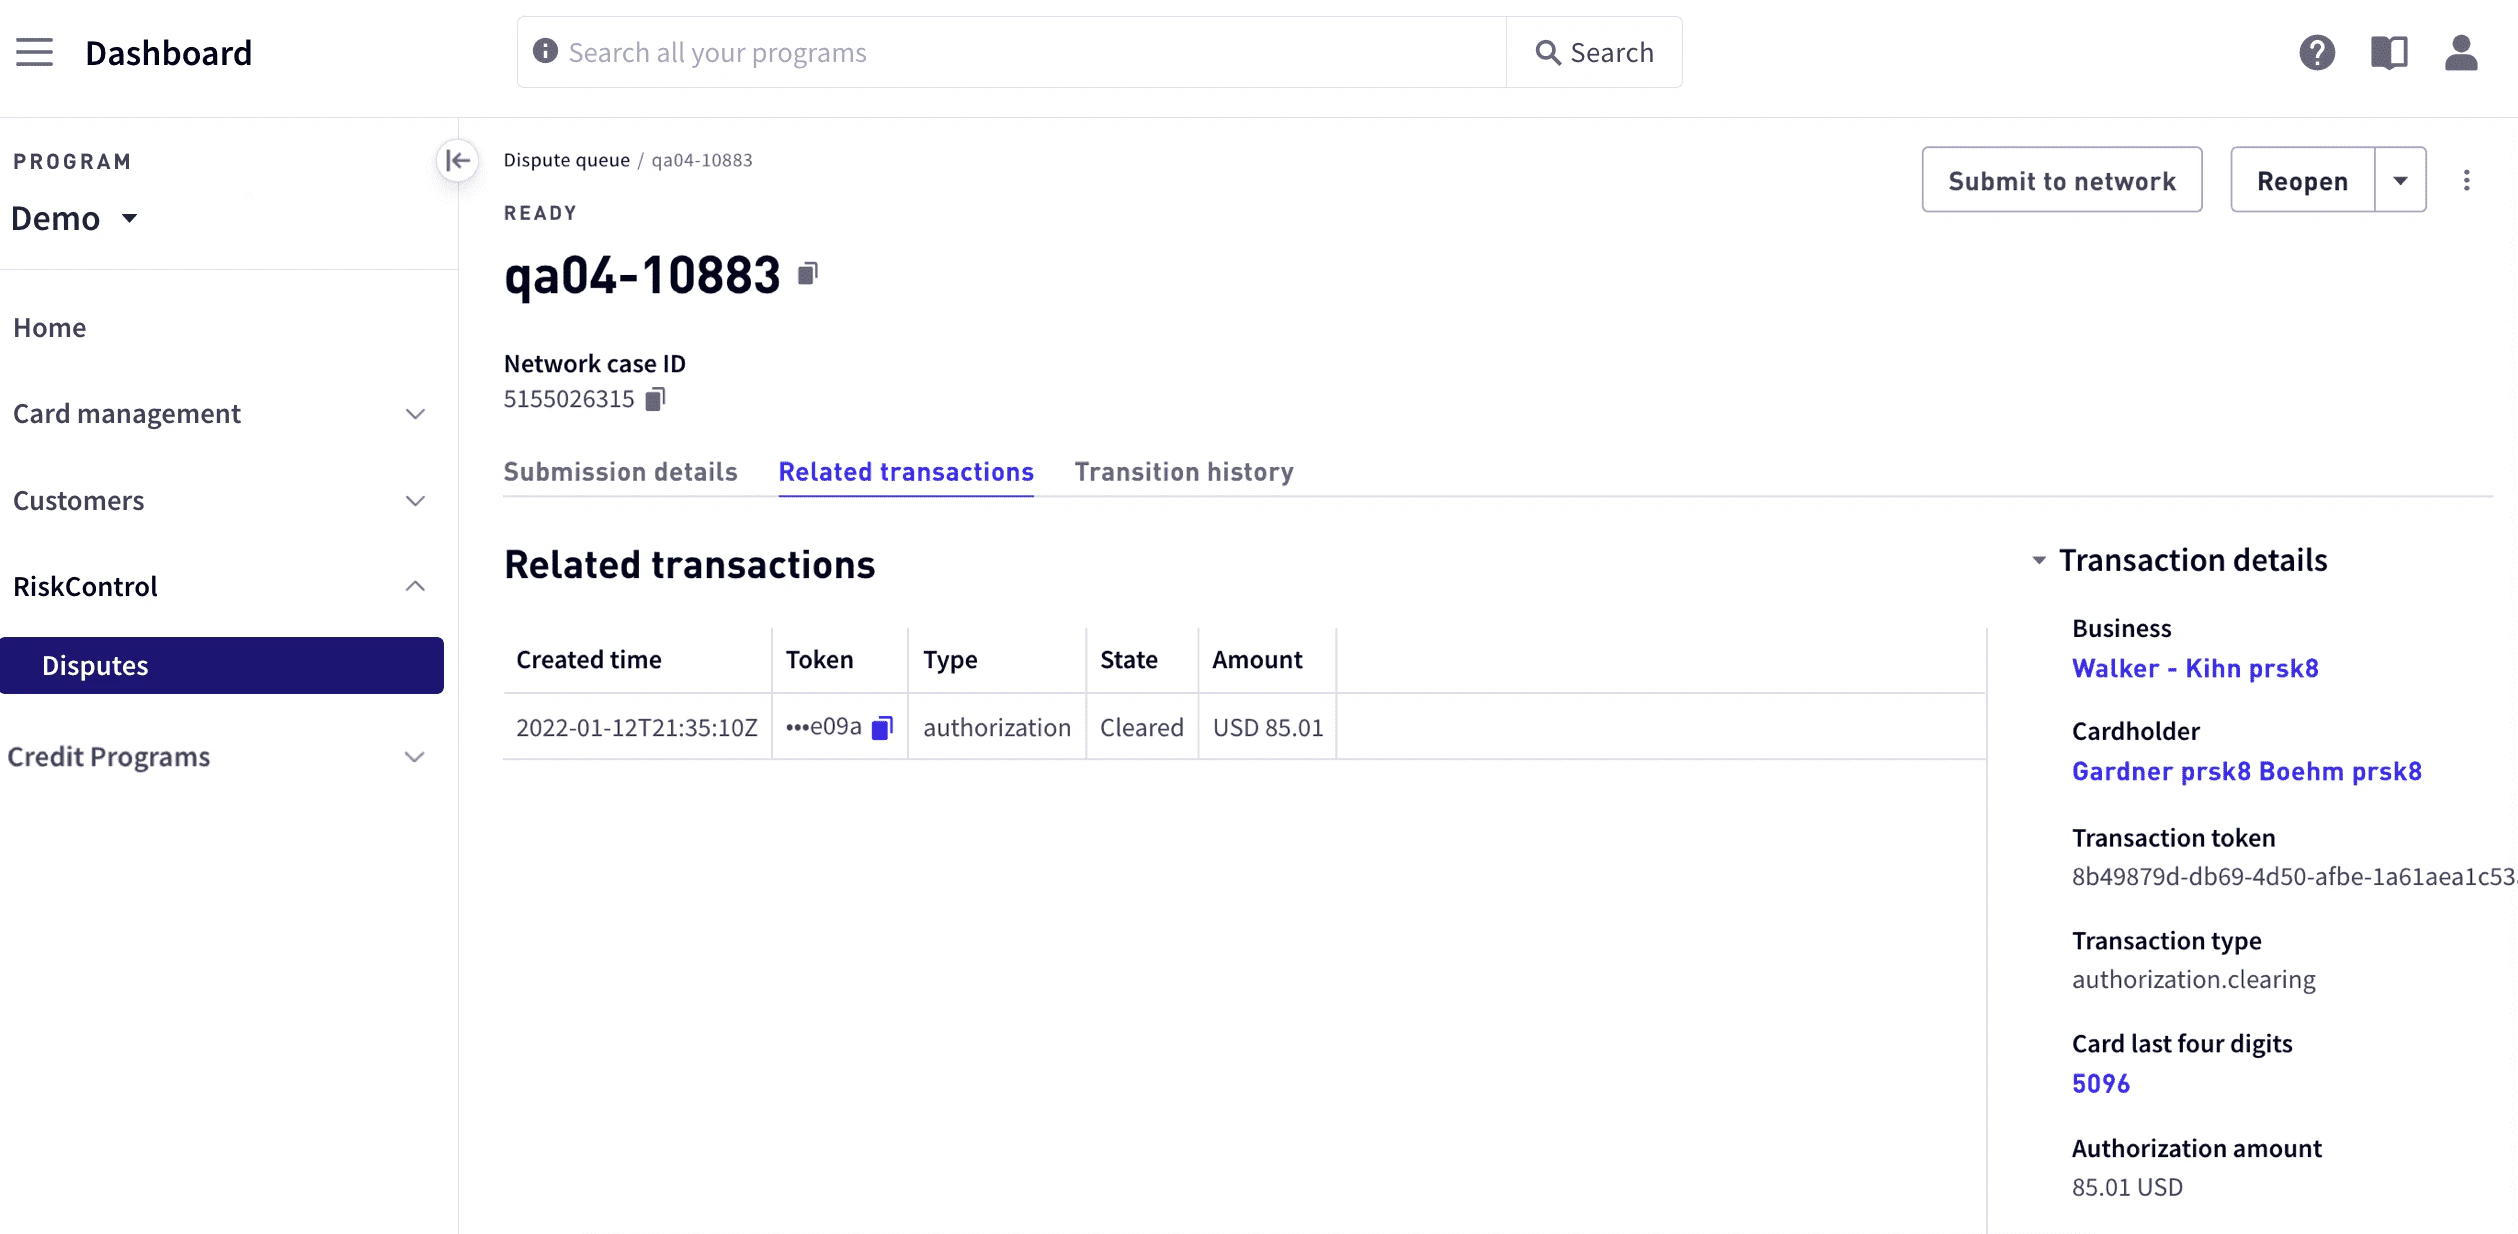
Viewing dispute case transition history
To view a transition history:1
In the sidebar, select RiskControl > Disputes.
2
Select the dispute or select See details from the vertical ellipsis icon at the right of the row.
3
Select the Transition history tab.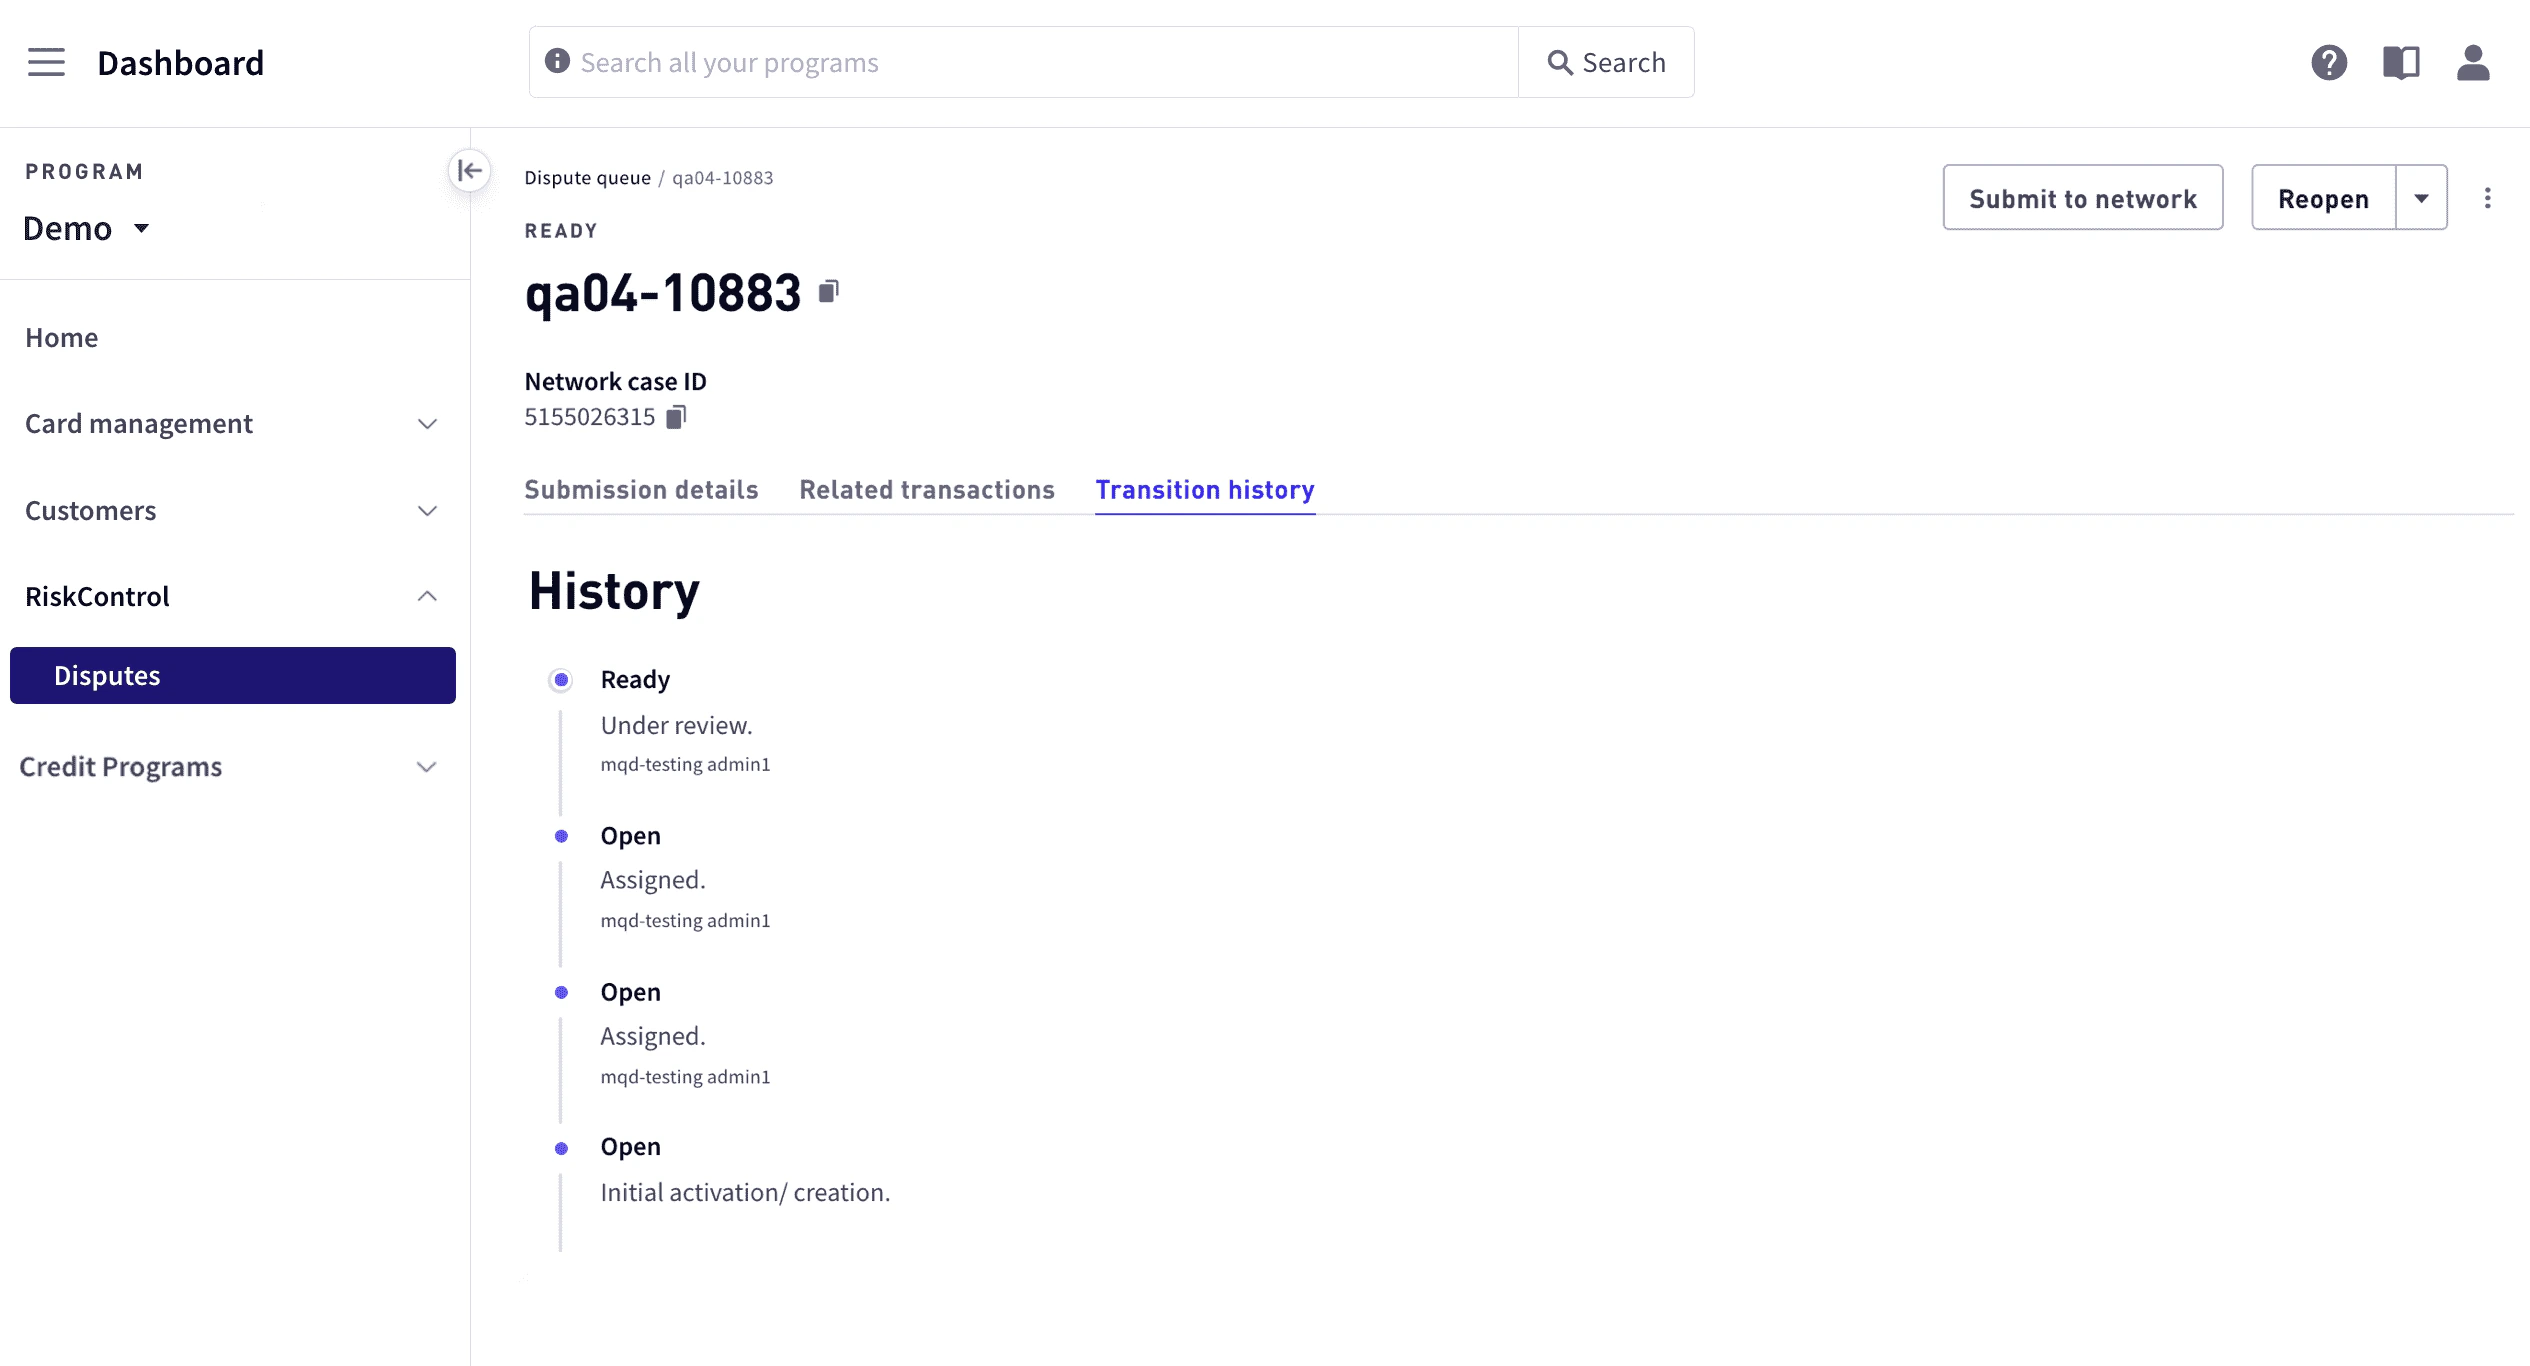
Creating a dispute case
Transactions can be disputed if they are in either a cleared or completion state. When you create a dispute case, you will need to provide dispute details and upload required documents. You can create a dispute case from the Users list or from the Disputes queue. To create a dispute from the Users list:1
From the sidebar, select Customers > Users, then select the user. To search for a user, select Filter.
2
Do either of the following:
- Select the Transactions tab. To search for the transaction, select Filter.
- Select the Cards tab, select the card from the list of cards, and then select the Card transactions tab. To search for the transaction, select Filter.
3
Select the vertical ellipsis at the far right of the row and select Dispute.
4
In the Create dispute work area, select either Full transaction amount if the entire amount is being disputed, or select Other amount and enter the amount being disputed.
5
For Cardholder contact date, enter the date and time when the cardholder made first contact disputing this transaction.
Note
This
This
datetime is used to determine when provisional credit must be granted. For details on granting provisional credit, see Granting provisional credit. For information on the provisional credit process, see Managing provisional credits.6
For Dispute reason, select a dispute reason or enter a reason code. For a list, see Dispute reasons and codes.
7
Depending on the dispute reason, specify the details of the dispute. Specify the means of payment with sufficient transaction details to allow the merchant to locate the transaction.
8
In the Notes text box, enter any additional details.
9
Select Create dispute.
10
To continue with the case, select Continue. To return to Transactions or Card Transactions, select Return to transactions.
1
From the sidebar, select RiskControl > Disputes.
2
Select Create manual case in the upper right corner, enter the token for the transaction you would like to dispute, and select Continue.
3
In the Create dispute work area, select either Full transaction amount if the entire amount is being disputed, or select Other amount and enter the amount being disputed.
4
For Cardholder contact date, enter the date and time when the cardholder made first contact disputing this transaction.
Note
This
This
datetime is used to determine when provisional credit must be granted. For details on granting provisional credit, see Granting provisional credit. For information on the provisional credit process, see Managing provisional credits.5
For Dispute reason, select a dispute reason or enter a reason code.
For a list, see Dispute reasons and codes.
6
Depending on the dispute reason, specify the details of the dispute. Specify the means of payment with sufficient transaction details to allow the merchant to locate the transaction.
7
In the Notes text box, enter any additional details.
8
Select Create dispute.
Creating dispute cases in bulk
With bulk uploads you can upload multiple cases using a bulk file in.xlxs format that contains the information for each case. Bulk uploads bypass the typical dispute creation process, moving the case state directly to the initiated state. Because records in a bulk file must conform to exact file formatting, using bulk uploads may require additional maintenance.
After dispute cases are successfully uploaded in a bulk file, each case can be managed using the procedures described in Managing dispute cases.
Note
Only Visa fraud and authentication disputes can be submitted in bulk. All other disputes must be individually created and submitted, as described in Creating a dispute case.
Only Visa fraud and authentication disputes can be submitted in bulk. All other disputes must be individually created and submitted, as described in Creating a dispute case.
- Download the template.
- Create the bulk upload file.
- Create the object rows.
- Upload the file.
- View the failure report.
Download the template
To download the template:1
In Dashboard > RiskControl > Disputes, select Bulk upload.
2
Under .xlsx templates, select Chargeback.
Create the bulk upload file
Using the template, create and populate your upload file. When naming your upload files, avoid special characters and spaces in the filename. Use unique filenames. You cannot upload the same file with the same name multiple times. Include only Fraud and Authorization disputes in the file. For each dispute, include the clearing transaction token in theTRANSACTION_TOKEN field. All fields are required. Smaller files result in faster upload times. The file must include the following fields:
Upload the file
To upload the bulk file:1
In Dashboard > RiskControl > Disputes > Bulk upload, select Browse and choose a bulk upload file that conforms to the
.xlxs template.2
Select Upload. The upload process may take several minutes.
3
If an Unable to upload file error message appears during the upload process, wait a few minutes and try again.
View the failure report
After the Marqeta platform processes your bulk upload file, it generates a failure report containing your complete request along with relevant data for each record in the file. Depending on the size of the upload file, the report may take several minutes to generate. Completed files appear under Bulk upload history. After uploading a file, select Refresh periodically to see if your uploads have completed. Download the failure report to view any disputes that failed to upload. If the report file is empty, no failures have occurred for that upload. To view a report:1
In Dashboard > RiskControl > Disputes, select the Bulk upload tab.
2
Select the Download report link in the Failure Report column. If you do not see the link for the uploaded file, select Refresh and check back after 20 to 30 minutes.
3
Open the downloaded file. The filename is prefixed with
REJECTED-, followed by the datetime of the upload, and concatenated to the upload filename, for example, REJECTED-2021-01-19-192915_myuploadfilename. The following information is returned in the .xlxs file for each transaction that failed from the uploaded bulk file:Recovering from unsuccessful uploads
If any disputes have not successfully uploaded from the bulk file, either include these in a new upload file, ensuring that all required information is included and correctly formatted, or manually create the case as described in Creating a dispute case.Managing dispute cases
After you have created a case, you need to provide any additional information required and move the case along the case timeline to the next case state until the case is resolved. The following are the case states from when the case is opened until it is closed:
The current state appears in the
State column in the Disputes Queue.
Transitioning a dispute case
The following general steps allow you to enter all the required information, gather the required documents, and submit the case to the card network:- Review for associated transactions (Visa only).
- Upload required documentation.
- Confirm case details and set the case to Ready.
- Submit the case to the card network.
- Close the case.
Review for associated transactions (Visa only)
The associated transaction table displays any transactions that the card network has listed as possibly associated with the current dispute. Up to 500 transactions are displayed from the card network. To review associated transactions that may be duplicates and withdraw them:1
In the Disputes tab of Dispute details, select Review associated transactions. Transactions that appear to be similar to the dispute information are displayed under Review associated transactions. These are transactions that have a transaction type that are the same as the original transaction.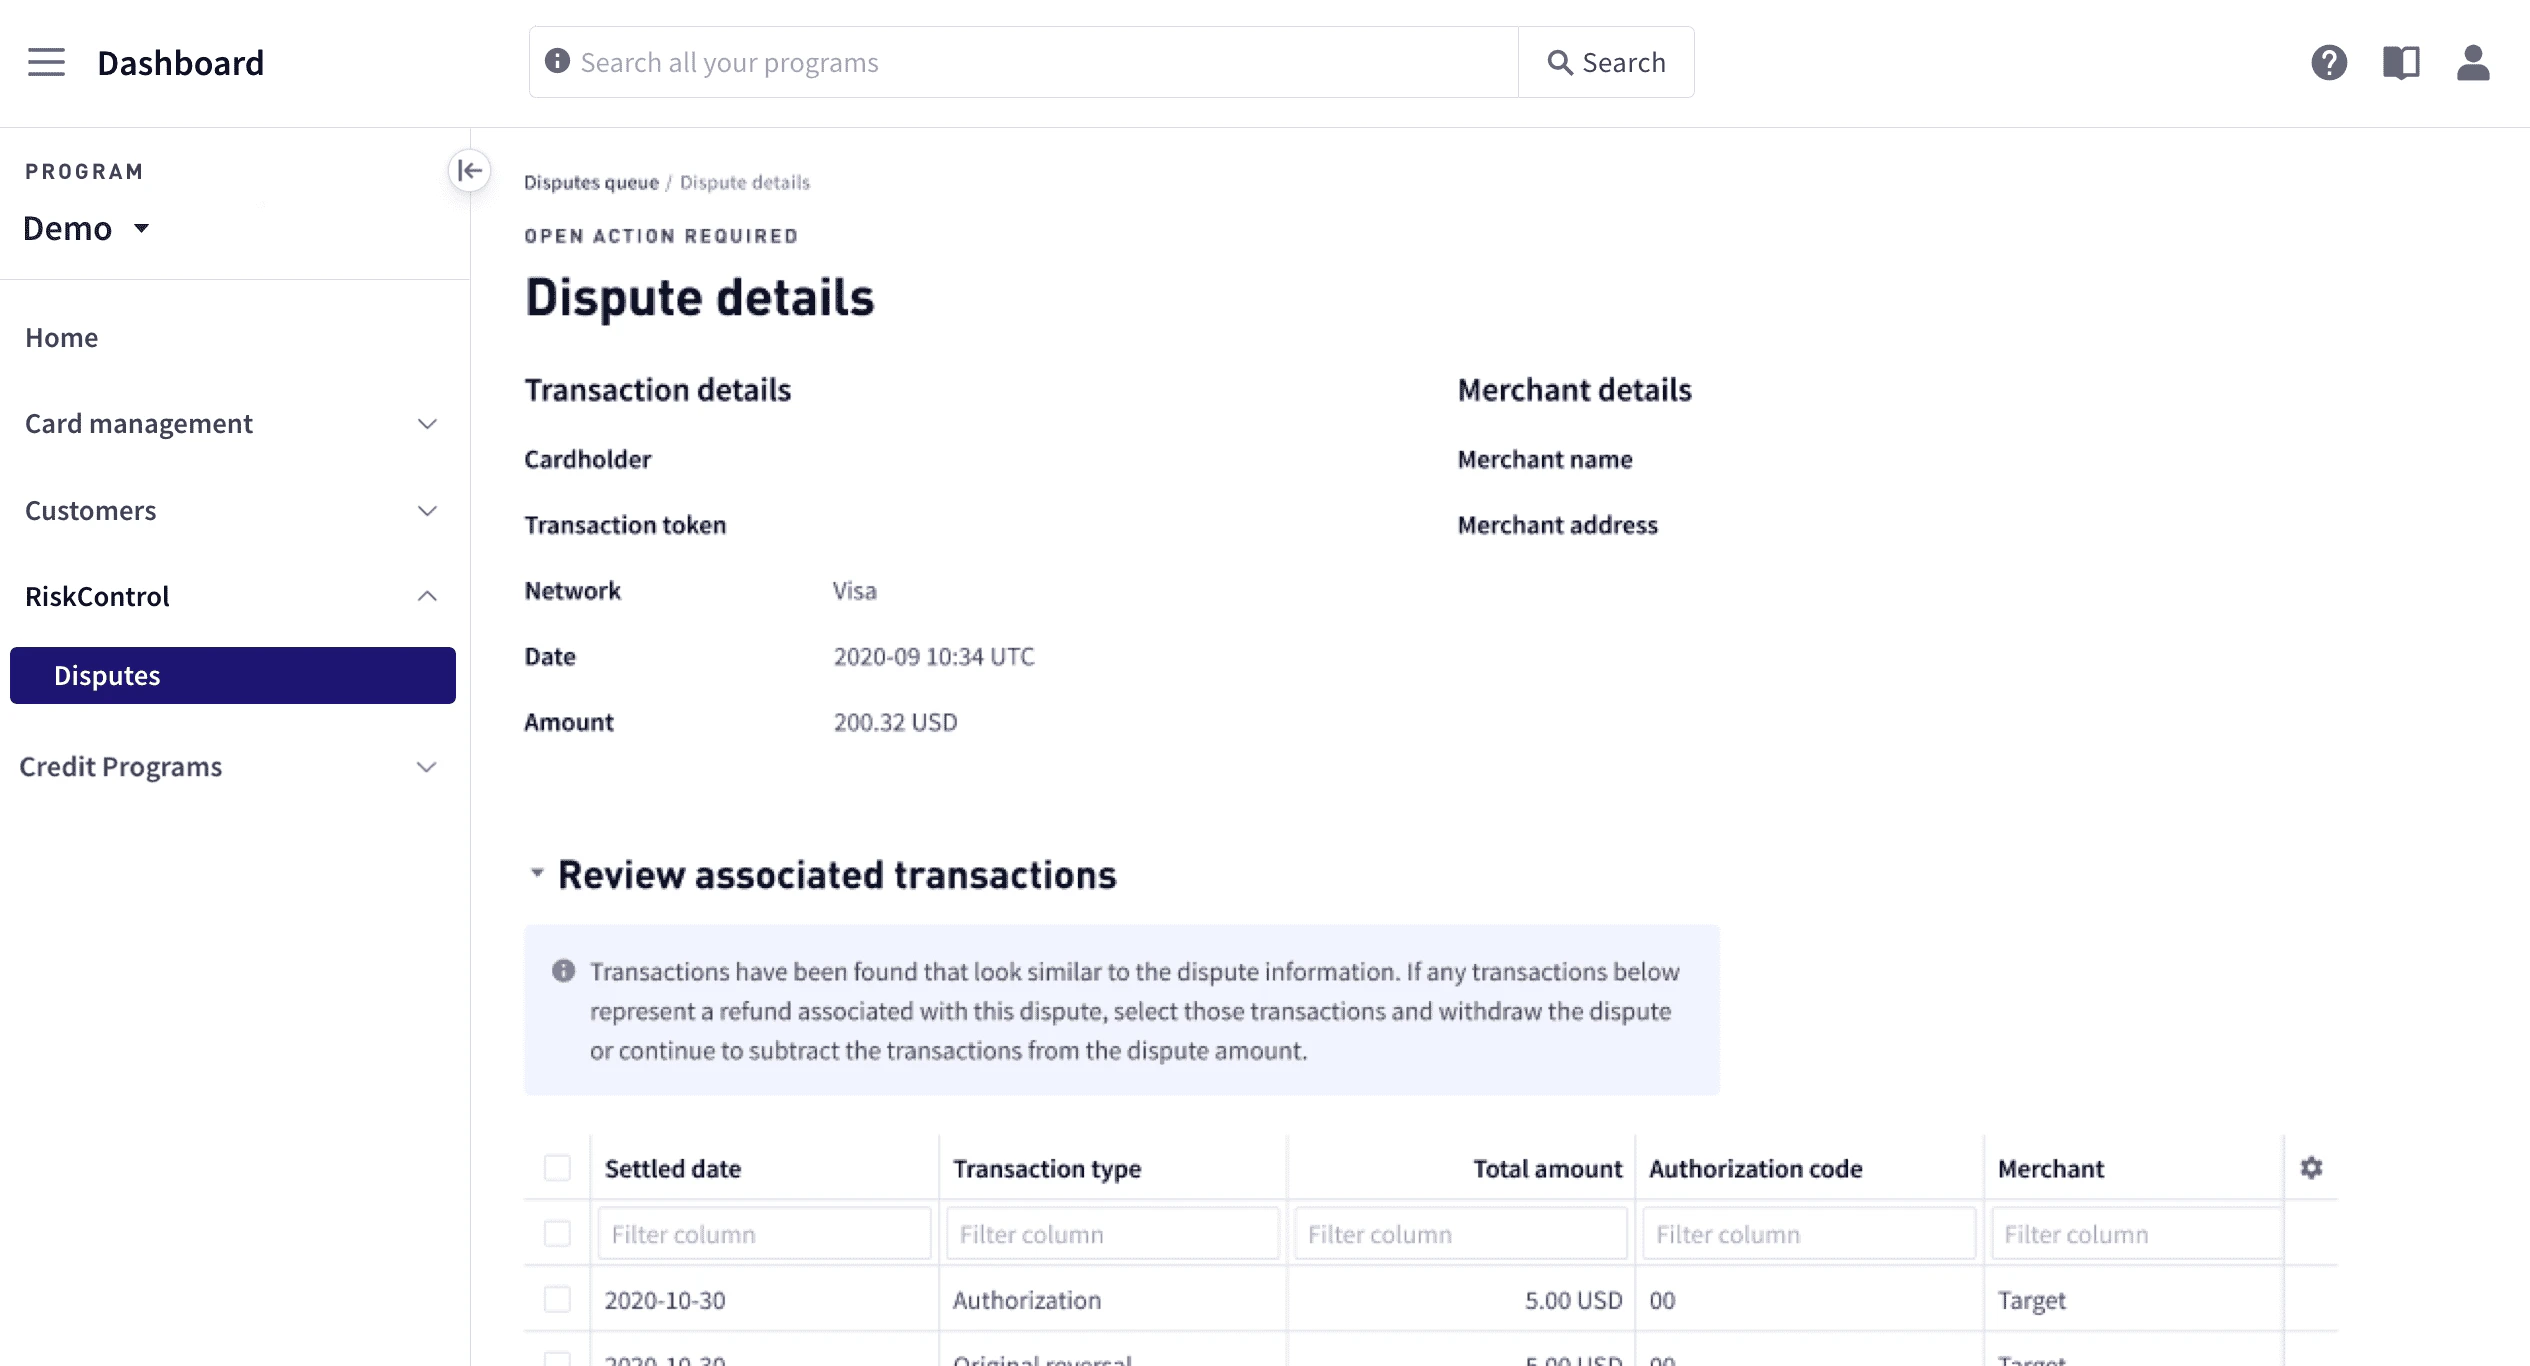
2
Select any associated transactions. Scroll down to view additional transactions, if necessary.
3
If any transactions in the list represent a refund associated with this dispute, select those transactions and select Withdraw and close to withdraw those disputes.
4
If there are no associated transactions, select These transactions are not associated.
5
If the transaction type is credit, provide any useful information in Explanation of credit.
Upload required documentation
Upload any documents related to the case. If a case is submitted without the required documentation, the case could be lost. If a non-Visa method of payment was used, upload documents detailing payment by other means such as a bank statement, canceled check, or receipt. To upload documents:1
In Dispute details, select Upload related documents.
2
For each document, select Upload and locate the document. An image of each uploaded document is displayed.
Confirm case details
In this step, confirm case details and get the case ready to submit to the card network. Specify any details that were not specified, incomplete, or incorrect, including the means of payment with sufficient transaction details to allow the merchant to locate the transaction. To confirm the case details:1
In Dispute Details, select Confirm dispute details, and enter or edit the details as appropriate.
2
For any duplicate transactions, choose the reason for the duplication:
- Same merchant on the same card
- Same merchant on a different Visa card owned by the same issuer/cardholder
- Same merchant, but paid by other means
3
For partial disputes—that is, if the disputed amount less than the transaction amount—ensure that relevant documents are loaded and enter the disputed amount.
4
Select Mark as ready.
Respond to a prearbitration request
Prearbitration allows the cardholder and the merchant to provide further information about the dispute. It also allows the cardholder to submit a second dispute if the initial dispute was rejected. You can accept liability or submit a response. For additional details, see Prearbitration. To accept liability:1
In Dashboard > Disputes, select the dispute.
2
In the Backend resolution tab, select Accept liability to accept the liability and submit your response.
1
In Dashboard > Disputes, select the dispute.
2
In the Backend resolution tab, select Respond to prearbitration.
3
In the Prearbitration response dropdown pane, enter the details of your response.
4
Select Attach files and upload any related files pertinent to the prearbitration.
5
Select Submit prearbitration response.
Submit the case to the card network
For a case that is in a Ready state, you can send it to the card network by choosing Submit to network in the upper-right corner. You can also submit a case from the Dispute Queue:1
Select Dashboard in the upper-left corner, then select RiskControl > Disputes from the sidebar.
2
Select the vertical ellipsis icon at the right of the row, and choose Submit to network.
Close the case
Once you have received a decision from the card network and the case is resolved, you can close the case. To close the case, select Close case.Reopening a case
If a case has been closed but needs to be reopened. To reopen a case:1
Select Dashboard in the upper-left corner, then select RiskControl > Disputes from the sidebar.
2
From the vertical ellipsis at the right the dispute row, select Reopen case.
Granting provisional credit
When you create a dispute, if provisional credit is applicable, the provisional credit status is displayed at the top of the work area. In addition to the status, the dashboard provides a message describing the action required and a link to perform the action. Provisional status can be:
If provisional credit is required but has not been granted, Provisional credit status with the number of days remaining to issue the credit and a link to issue the credit are displayed at the top of the work area:
You have 10 days left to grant a provisional credit for this case. Click here to issue
To issue the provisional credit:
1
Select Click here to issue. A message similar to the following is displayed:
You are about to issue a \$300 USD provisional credit for this case. Ensure that the credit amount is correct.2
Select Confirm.
The following message is displayed:
The following message is displayed:
You are about to submit the case to the card network. Ensure that all information provided is correct before submitting. Transition note (optional)3
Select Submit. The status is changed to Granted.
Viewing the chargeback report
You can view a chargeback report in the Marqeta Dashboard Reports area. To access the report:1
Select Dashboard in the upper-left corner, then select Reports from the sidebar.
2
Select the Risk Monitoring — Chargebacks report.
Dispute reasons and codes
The available dispute reasons and reason codes are given below per card network:Reporting fraud
The Visa network requires issuers and programs to report fraud to the card network regardless of the amount. Whenever a cardholder reports fraud, a subsequent fraud report must be created with the card network. Noncompliance with network rules results in fines and suspension of the ability to process chargebacks.Ways to report fraud
The following are ways you can report fraud:- Create a fraud report for one specific instance using the Marqeta Dashboard as described below in Reporting fraud individually.
- Create fraud reports for a set of transactions within a network using bulk upload as described below in Reporting fraud in bulk.
- For the Visa network, initiate a chargeback.
Fraud types
Here are Visa guidelines for selecting the correct fraud type for reporting:Reporting fraud individually
To report fraud in bulk from the Marqeta Dashboard:1
Select Dashboard in the upper-left corner, then select RiskControl > Disputes from the sidebar.
2
Select Create manual case, enter the token for the transaction you would like to dispute, and select Continue.
3
Select Fraud Report if you are only reporting fraud and not creating chargeback.
4
From the Fraud type dropdown, select the type of fraud you are reporting. See Fraud types.
5
In the Notes text box, enter any freeform text as needed.
6
Select Create to submit the report to Visa. Once the fraud report is submitted to Visa, Marqeta automatically closes the case.
Reporting fraud in bulk
With bulk uploads you can upload multiple fraud cases using a bulk file in.xlxs format that contains the information for each fraud case. Because records in a bulk file must conform to exact file formatting, using bulk uploads may require additional maintenance.
Note
Only Visa fraud disputes can be submitted in bulk.
Only Visa fraud disputes can be submitted in bulk.
- Download the template.
- Create the bulk upload file.
- Create the object rows.
- Upload the file.
- View the failure report.
Download the template
To download the template:1
In Dashboard > RiskControl > Disputes, select Bulk upload.
2
Under .xlsx templates, select Fraud report.
Create the bulk upload file
Using the template, create and populate your upload file. When naming your upload files, avoid special characters and spaces in the filename. Use unique filenames. You cannot upload the same file with the same name multiple times. Include only Fraud disputes in the file. For each dispute, include the clearing transaction token in theTRANSACTION_TOKEN field. All fields are required. Smaller files result in faster upload times. The file must include the following fields:
Upload the file
To upload the bulk file:1
In Dashboard > RiskControl > Disputes > Bulk upload, select Browse and choose a bulk upload file that conforms to the
.xlxs template.2
Select Upload. The upload process may take several minutes.
3
If an Unable to upload file error message appears during the upload process, wait a few minutes then try again.
Rejection from the Visa network for Compelling Evidence 3.0-enabled merchants
If the merchant is enabled for compelling evidence 3.0, and there are at least two historic transactions that meet the Remedy Prior Undisputed transaction criteria, rejection from the card network can happen at two points in the dispute workflow:- Pre-dispute
- Post-dispute
Pre-dispute rejects
If a rejection happens in this case, you will see one of the following errors when you attempt to initiate the dispute with the card network. These disputes move toOpen Action Required.